• Skip to primary navigation
  • Skip to main content
  • Skip to primary sidebar

The Other Side of the Tortilla

  • HOME
  • ABOUT
    • CONTACT ME
    • FAQ
    • PRESS
    • PRIVACY POLICY
    • MEDIA KIT
    • ADVERTISE
  • RESOURCES
    • BOOKS
    • SHOP
    • INGREDIENTS
    • KITCHEN TOOLS
    • Thanksgiving
    • Mexican Christmas Traditions
  • RECIPES

cebolla

Chiles toreados

335 · Jul 21, 2014 · 10 Comments

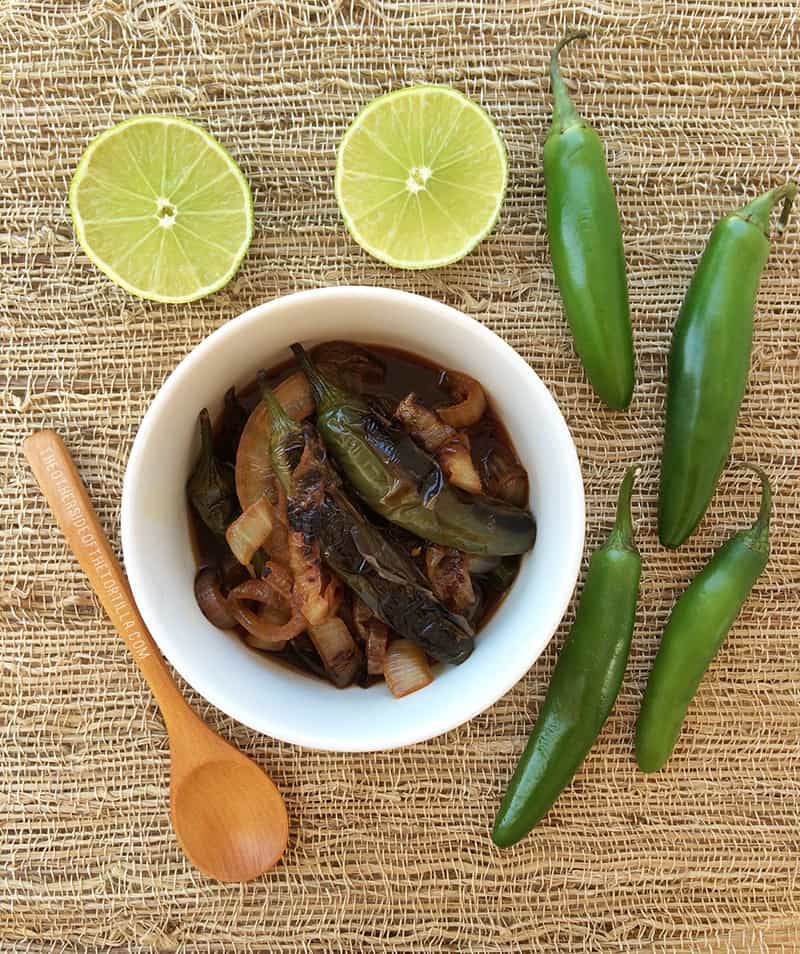
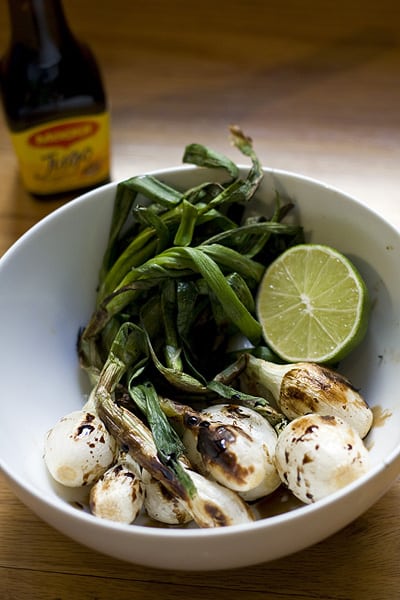
Chiles toreados are a dish that you’ll commonly find in taquerías in Mexico.

They’re usually made with serrano or jalapeño chiles that are sautéed in oil until the chiles are blistered. There are many different ways to make chiles toreados—some people use the chiles alone, but I like to cook onions with them too. There are also a variety of ways to make the sauce, which is part of the beauty of this recipe. There’s no wrong way to make them; it’s just a matter of personal taste.

Chiles toreados recipe from theothersideofthetortilla.com made with serrano chiles, onion, lime juice and Kikkoman soy sauce

This post and recipe are part of a compensated campaign in collaboration with Kikkoman and Latina Bloggers Connect.

Rather than cook the chiles in vegetable oil, I’ve opted for a slightly healthier method by using coconut oil spray to cut down on the amount of oil used. No need to worry about your chiles tasting like coconut, though—the taste won’t infuse into the chiles.

This dish can be served as an appetizer or as an accompaniment to tacos of your choice. Chiles toreados are also naturally vegan-friendly!

Chiles toreados recipe from theothersideofthetortilla.com made with serrano chiles, onion, lime juice and Kikkoman soy sauce

I’ve eaten this spicy, salty side dish in both hole in the wall and upscale taco joints and the taste varies slightly from place to place. Some cooks like to add oyster sauce for a little umami flavor, but I prefer to keep mine classic with just lime juice and soy sauce. Kikkoman soy sauce is a versatile ingredient that can be used to cook many different types of cuisines. In Mexico, you’ll also often see chiles toreados served in sushi bars and restaurants, as it’s a perfect pairing for dipping rolls, similar to the spicy mixture of soy sauce and wasabi paste that is traditionally used in Japanese cuisine.

This particular dish is most commonly made with regular soy sauce, but if you’re trying to keep your sodium intake down, you can substitute Kikkoman low-sodium soy sauce or even the lime ponzu for a lighter, less salty flavor. I typically use the low-sodium Kikkoman soy sauce in my kitchen. If you want to make the dish spicy, use serrano chiles (and if you like it REALLY spicy, add another chile or two); if you want to make it less spicy, substitute jalapeño chiles for the serrano chiles.

Chiles toreados recipe from theothersideofthetortilla.com made with serrano chiles, onion, lime juice and Kikkoman soy sauce

3 votes

Print

Chiles toreados

Prep 5 mins

Cook 15 mins

Total 20 mins

Author Maura Wall Hernandez

Yield 2-3 servings

A classic Mexican taquería dish, chiles toreados are roasted serrano or jalapeño chiles, blister cooked with onion and marinated in a soy sauce and lime juice mixture.

Ingredients

  • Three 1/4 inch slices of white onion, cut in half moons and rings separated
  • 7 serrano chiles, stems trimmed or cut off as close to the top as possible (I like to leave a little stem because they look nicer)
  • 1/4 cup Kikkoman low sodium soy sauce
  • Juice of one lime

Instructions

  1. Spray pan with non-stick cooking spray or coconut oil spray and preheat the pan over medium heat for two minutes.
  2. Add chiles and onions to the pan and cover with a lid. Cook for about 5 minutes, remove the lid and stir. Replace the lid and cook for another 5 minutes.
  3. While the onions and chiles are cooking, in a measuring cup, mix 1/4 cup soy sauce and the fresh-squeezed juice of one lime. Stir to incorporate.
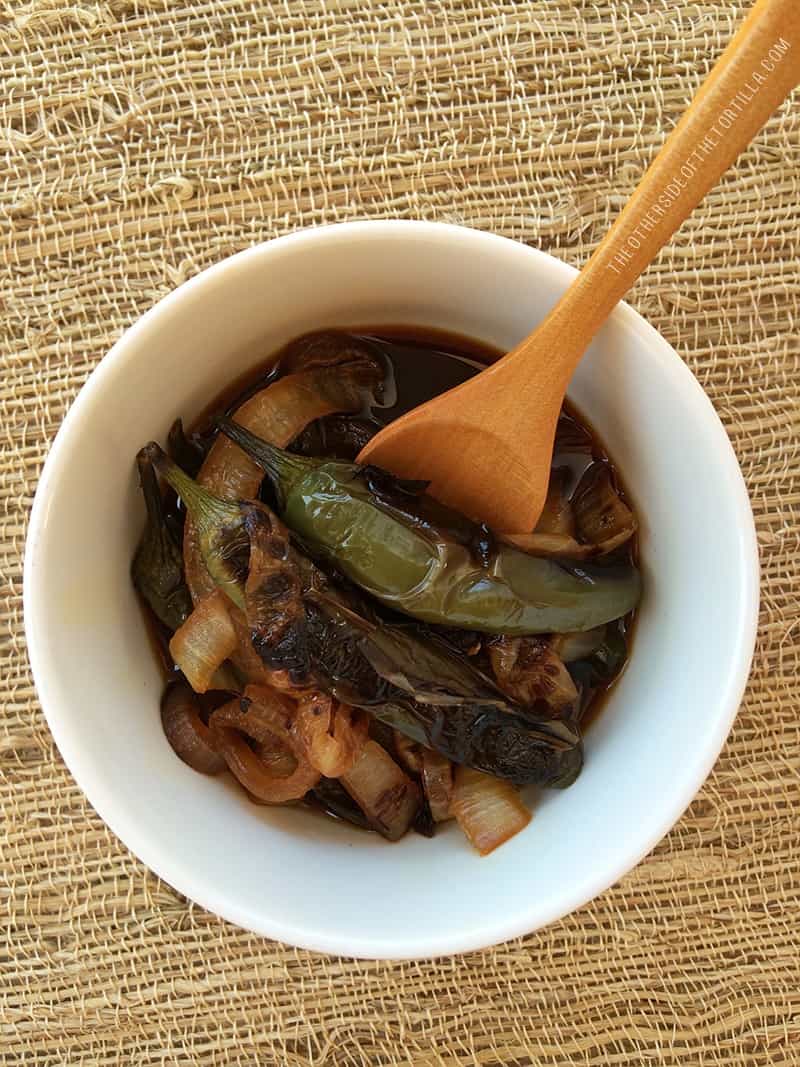
  4. At this point your chiles should be blistering and charring nicely in the pan and splitting open slightly. Keep cooking them until they’re as blistered and charred as you like, but remove the onions if necessary so they don’t blacken completely and burn.
  5. When the chiles are blistered and charred to your liking, add the onions back into the pan and pour the soy sauce and lime juice mixture into the pan. Cook for 2-3 minutes, stirring to coat the onion and chiles.
  6. Remove from heat and transfer to a glass or ceramic bowl and allow to come to room temperature before serving. 

Notes

Store leftovers in an airtight container in the refrigerator for up to 5 days.

Cuisine Mexican


Here’s a video I made of this recipe at the Kikkoman test kitchen after I won a contest and was invited to Kikkoman headquarters in San Francisco in September 2014:

Check out more recipes using Kikkoman soy sauce and other products on the Kikkoman Sabor website.

Most Popular, Recipe, Snacks, Sponsored, Vegetarian/Vegetariano cebolla, chile serrano, Kikkoman, onion, salsa de soya, soy sauce, vegan

Botana de Chicharrón con Salsa Verde

12 · Feb 27, 2014 · Leave a Comment

Mexico is a very nose-to-tail consumer when it comes to eating animals; like in many other developing countries, and often motivated by economic circumstances in an effort to use the whole animal and not leave much—if any—waste, there are a lot of delicious and unique foods that have come out of this scrappiness. One of these simple delicacies is chicharrón, made of fried pork skins. 

Botana de chicharrón con salsa verde

This botana, or appetizer, of chicharrón served with salsa verde is very typical in Mexico. Generally, these pork skin cracklings are made by boiling the skin, hanging it to dry, then deep frying it in hot oil until the skin puffs up. They’re by no means a healthy snack, so should be eaten in moderation, but they’re a guilty pleasure worth the indulgence.

They’re not quite the same as processed food pork rinds or pork cracklings you might find in a potato chip-like bag in the supermarket. For that reason, it’s best to buy them from your local carnicería or near the butcher’s counter in any Mexican market.

…

Read More

Recipe, Snacks ajo, cebolla, chicharrón, chile serrano, garlic, Knorr Suiza, onion, tomatillo

Calabacitas con elote

9 · May 22, 2013 · 3 Comments

This is a sponsored post in collaboration with Latina Bloggers Connect and the California Milk Advisory Board.  The recipe and opinions are my own.

Calabacitas con elote is a traditional Mexican side dish, typically baked in the oven in a casserole dish or olla de barro. But I’m giving it a summer makeover by cooking it in easy-to-make foil packets for the grill.

Calabacitas con elote is a traditional Mexican side dish, typically baked in the oven in a casserole dish or olla de barro. Give the dish a makeover by cooking it in easy-to-make foil packets for the grill.  Recipe via theothersideofthetortilla.com

We’re spending tons of time outside with family and friends now that summer grilling season is here and this is a great dish to take to any parillada! This vegetarian dish is one of my favorites for serving as a quick dinner side dish as well as for taking to parrilladas (barbeques) that are typically full of meats but lacking enough veggies. If I’m making it for just the two of us, I refrigerate half the recipe and grill it later in the week so that it’s fresh off the grill at dinnertime.

Now that we live in California and have such a variety of fresh, local dairy, produce and meats available to us year-round thanks to the climate, I’ve been consciously trying to eat more locally (and by that, I mean seeking out locally grown produce at the farmers markets and other foods made in my new home state). California is the country’s leading producer of Hispanic dairy products, which are sold nationally, and is the nation’s second largest producer of cheese. In fact, California produces more than 25 kinds of Hispanic cheeses and many other dairy products. A Real California Milk seal means your dairy products are made from 100 percent California milk.

This is what the calabacitas should look like inside the foil packet when it’s done or almost done cooking:

calabacitas_con_elote_grill_packet_TOSOTT…

Read More

Recipe, Sponsored, Vegetarian/Vegetariano calabacita, California Milk Advisory Board, cebolla, chile poblano, corn, crema Mexicana, elote, grilling, onion, parrilla, parrillada, queso Chihuahua, queso Quesadilla, receta vegetariana, vegetables, vegetarian

Alambre de la Patrona

17 · Mar 29, 2013 · 4 Comments

This taco de alambre recipe is a Mexico City-style taco made with thinly sliced pork, bacon, chile poblano, onion and cheese.

I haven’t written much here about my favorite taquería in Chicago, La Lagartija, but have always widely recommended the place to anyone who asked me in person, on Facebook or Twitter about where to get an authentic Mexican meal in my hometown. I wasn’t exactly trying to keep it a secret, but it’s definitely a gem and I always appreciated the neighborhood charm and the way that the meseras and owners always remembered us and greeted us like family. I have so many photos of memorable meals we ate there, and it was the only place in Chicago where we’d regularly eat tacos al pastor.

RELATED RECIPE: Slow-cooker carnitas

But one of my favorite standby meals there, the alambre, is both succulent and super easy to recreate at home. This recipe is my own spin on one of their alambres. The owners are from Mexico City, and the dish on their menu is actually a version of a popular dish at one of our favorite taquerías in Mexico City, El Charco de las Ranas. This dish is also sometimes known as alambre de chuleta and is best served with warm tortillas, but you can skip the tortillas if you like and just eat it with a fork.

alambre_de_la_patrona_tacos…

Read More

Finding Mexico in Chicago, Meat, Plato fuerte/Main dish, Recipe, Tacomiendo "El Charco de Las Ranas", bacon, cebolla, Chicago, chile poblano, La Lagartija Taquería, Mexico City, onion, pork, puerco, tocino

Salsa mexicana for one

3 · Sep 16, 2012 · 6 Comments

I often get asked how to make pico de gallo by my non-Mexican friends and, sometimes, new readers here. If you’re a regular reader or you know me personally, you probably know where this is going. In our house, pico de gallo is not the typical fresh salsa you may be familiar with, made of tomato, onion and cilantro. Instead, pico de gallo is a snack made with jicama, red onion, cucumber, orange, serrano chile, lime juice and sprinkled with Tajín. So, if you come to my house and ask for some pico de gallo, now you know what to expect.

What a lot of people call pico de gallo, though, we call salsa mexicana. And it’s extremely easy to make! To be clear, in most places if you ask for pico de gallo, the recipe below is what you’ll get. Since I’ve been asked several times in the last week how to make this easy, fresh salsa, I decided I might as well share it here for anyone who doesn’t already know how to make it. It’s easy to assemble in a big batch because you can play with the amounts of each ingredient to taste, but it’s a little more difficult to get it right when making a very small batch for only one or two people for a single meal, so I’ve provided directions below for the portions that I use.

A note, first: The chile is optional. I always put it in my salsa mexicana, but you don’t have to if you’re averse to spicy food. Or, if you want to go kind of half-way with it, you can cut a serrano chile open, remove the seeds and veins and chop it very finely. If you do that, you may still want to use half of the suggested portion and add more to taste as you can tolerate. But if you leave it out all together, just increase the amount of cilantro to taste. You’ll still have a nice salsa and no one will know anything is missing.

…

Read More

Comer Sano/Eat Healthy, Recipe, Salsa, Staple Recipes cebolla, chile serrano, cilantro, jitomate, lime, onion, tomato

Wordless Wednesday: Guaca-tacos

0 · Mar 21, 2012 · 2 Comments

I posted this photo on Instagram last week as I was eating leftover guacamole in the form of tacos, also known in my household as guaca-tacos.


You can find my guacamole recipe here. Sometimes I like to substitute red onion for white onion (like I did here, though it’s difficult to tell from the photo). It’s a substitution I picked up from my mom since she normally makes her guacamole with red onions.

  • Do you ever eat guacamole tacos?

Vegetarian/Vegetariano, Wordless Wednesday aguacate, avocado, cebolla, guacamole, jitomate, red onion, tomato

Vegetarian tacos de hongo, chile poblano y cebolla

9 · Mar 13, 2012 · 2 Comments

Vegetarian tacos made with sauteed mushrooms, poblano chile and onions. Recipe via theothersideofthetortilla.comI’ve really been wanting to reduce the amount of meat we eat on a daily basis in order to be a bit healthier. I love veggies and don’t mind vegetarian meals, but when you live with a serious carnivore, it’s sometimes really difficult to convince them that a vegetarian meal is a) good and b) filling enough to be a meal and not just an appetizer.  Enter the idea of vegetarian tacos.

Enter the idea of vegetarian tacos.

Sometimes the mere mention of serving a vegetarian meal summons an apocalyptic response in my household. If you can’t get your family to eat a full vegetarian meal, this dish makes a great appetizer to ease them into enjoying it; just double or triple the recipe depending on how many people you’re feeding. They may soon see that an all-veggie meal isn’t so bad after all.

And if you’re truly desperate to get them to eat veggies, you can always add a little crumbled chorizo to this dish. It’s not meatless, but hey, at least they’re eating veggies, right? (You could also attempt to substitute soyrizo for chorizo if you’re brave, but I can’t be held responsible if they figure you out and throw their chanclas at you.)

Regardless, whether you’re vegetarian, trying to get your family to eat less meat or just trying to observe meatless meals during Lent, this is a quick and easy recipe you’re bound to enjoy.

I like to use baby portabellas for this recipe, but you can use  just about any kind of regular medium-sized mushroom you like so long as you slice them somewhat thickly so that when they saute with the onions and butter, they don’t shrink too much, or get too thin when they’re fully cooked.

RELATED: How to roast poblano chiles

…

Read More

Comer Sano/Eat Healthy, Recipe, Snacks, Vegetarian/Vegetariano cebolla, champiñones, chile poblano, Cuaresma, hongos, Lent, mushrooms, onion, quesadilla, receta vegetariana, vegetables, vegetarian

Homemade chorizo

84 · Dec 20, 2011 ·

 Homemade chorizo is a lot easier to make than you think!

How to make your own homemade chorizo. Get this and more Mexican recipes at theothersideofthetortilla.com.

I always used to buy chorizo prepackaged or from the butcher because I thought it would be too hard to make at home. After months of wondering, I finally decided to delve in and give it a shot. The results were fantastic! Now that I know how incredibly easy it is to do on my own, I’ll think twice next time I reach for a package of chorizo in the grocery store.

RELATED RECIPE: Queso fundido with chorizo

A lot of people think of Spanish chorizo when they read chorizo in an ingredient list, and though Mexican chorizo is different, it’s equally delicious. Spanish chorizo is a hard, cured meat (think similar to a cured hard salami), and Mexican chorizo is a soft sausage-like meat, almost like a breakfast sausage patty if you broke it up into little bite-size pieces.

I love to use chorizo in a variety of ways: anything from breakfast dishes such as huevo con chorizo, to snacks such as queso fundido, to spicing up vegetables in dishes such as calabacitas rellenas. It’s also great as a topper to tostadas or sopes, and can be used to make fun little party appetizers like these chorizo and avocado cups with chipotle crema.

RELATED RECIPE: Huevo con chorizo breakfast tacos

I used a blend of three chiles to make my homemade chorizo slightly spicy and also some chopped onion and garlic to give it the right texture. The vinegar helps with giving the meat the signature crumble of Mexican chorizo.

This chorizo needs to be cured in the refrigerator for 4-6 days to allow the chiles and garlic to mellow, and for the vinegar to do its work on the texture.

Print
Chorizo Casero | Homemade Chorizo

Chorizo Casero | Homemade Chorizo

My chorizo recipe was recommended by the New York Times Diner's Journal in December 2011.

Ingredients

  • 1 pound ground pork
  • 2 cups of water (for soaking the chiles)
  • 4 chile guajillo
  • 3 chile de arbol
  • 1 chile ancho
  • 1/2 teaspoon Mexican oregano
  • 1/4 teaspoon black pepper
  • 1 1/2 teaspoon kosher salt
  • 2 quarter-inch thick slice of white onion (one slice will go in food processor; other will be finely chopped)
  • 7 large garlic cloves (reserve 2 for later)
  • 1 tablespoon apple cider vinegar
  • 2 tablespoons Nakano rice vinegar

Instructions

  1. Bring two cups of water to a boil and remove from heat. Tear off the chile stems and soak the chiles for at least an hour or until completely soft. When the chiles are soft, remove them from the water, drain, and discard all the water. Do not remove the seeds from the chiles.
  2. Place the chiles, oregano, salt, pepper, one quarter-inch thick slice of onion and five cloves of garlic into the food processor or blender. Run for 5-10 seconds. Add the apple cider vinegar and rice vinegar. Reseal top of food processor or blender and pulse until the mixture is a smooth paste.
  3. In a glass mixing bowl, add the ground pork and make a well in the middle of the meat. Add half of the chile mixture and gently work it into the meat. Add the second half and repeat.
  4. In the food processor add the two remaining garlic cloves and pulse a few times so that it's roughly chopped. Add to the meat and chile mixture.
  5. Finely chop the second quarter-inch thick slice of onion. Add to meat and mix well to incorporate.
  6. Transfer the chorizo to an airtight container or a plastic zippered bag and store in the refrigerator for four to six days. It needs that time to cure and for the seasoning to mellow out. If you eat it before curing it, it may taste too spicy or too salty, the garlic will be very potent and the vinegar will be strong. If you can bear to leave it alone for six days to cure, it's worth the wait.
  7. After a few days, some liquid will run off the meat, which is completely normal. You can dump it out when you notice it or you can leave it up until you're ready to cook the chorizo. Be sure to discard the liquid either way.
  8. When it's ready to be eaten, just heat a frying man over medium heat, add the chorizo and fry it up until it's crumbly and well-done. Drain over paper towels and use in your favorite dish.

Notes

You can refrigerate cooked or uncooked leftovers for a few days or freeze raw meat in an airtight container or plastic zippered bag for a few weeks.

3.1
https://theothersideofthetortilla.com/2011/12/chorizo-casera/
©2009-2015 theothersideofthetortilla.com

RELATED RECIPE: Trenza de huevo con chorizo

This post is part of a sponsored series to promote Mizkan cooking wines, vinegars and marinades. We also received samples of Mizkan’s Holland House, Nakano and World Harbor brand products and promotional material from Mizkan to assist in preparing the posts. All opinions and recipes in this series are our own.

Meat, Recipe, Sponsored, Staple Recipes #MizkanLatino, apple cider vinegar, cebolla, chile ancho, chile de arbol, chile guajillo, chorizo, Nakano rice vinegar, onion, vinagre, vinegar

Sopa de frijol negro con chipotle

5 · Oct 7, 2011 · 3 Comments

Check out this fantastic and hearty black bean and chipotle chile soup I made this week. There are three reasons I love this recipe: First, you can make it in the blender—so it’s very easy to clean up afterward. Second, the whole recipe from prep to bowl can be made in 15 minutes or less! And last but not least, this recipe is very healthy—it’s low-fat and high in fiber. It makes a great first course if you divide into smaller portions, or with a little bolillo roll and butter, it can make an excellent and filling lunch or dinner.

black bean chipotle soup…

Read More

Comer Sano/Eat Healthy, frijoles/beans, Kenmore Genius Blog, Recipe, Soups, Stews, Caldos, Sopas y Guisados, Vegetarian/Vegetariano, Video ajo, black beans, caldo de pollo, cebolla, chicken broth, chile, chile chipotle, chipotle en adobo, comino, cumin, frijoles negros, garlic, Kenmore, Kenmore Genius Blog, Mexican oregano, onion, oregano Mexicano, Sopa, sopa de frijol negro, soup

Chile chicken tacos in the slow-cooker

10 · Jul 30, 2011 · 2 Comments

I’ve been working late into the evening recently so I decided to break out my slow cooker and put it to work for me! On top of the late nights, the brutal heat wave we’ve been having over the last few weeks has made me less than happy about spending time in the kitchen after a long day, especially if it involves heating up the oven or even the stove top for more than a few minutes because I don’t want to be any hotter.

This recipe for chicken tacos is great for a few reasons: it’s super easy to make, it takes very little effort to prepare and it can be used as a filling for three different dishes so if you make a little extra you can turn it into more than one meal.

It can be used just as a regular old taco filling, rolled and fried in a tortilla to make taquitos or even rolled and bathed in salsa and topped with cheese as enchiladas. The biggest bonus of all: It won’t heat up the kitchen….

Read More

Kenmore Genius Blog, Plato fuerte/Main dish, Recipe, Slow-Cooker recipes, Sponsored aguacate, avocado, basic chicken stock, cebolla, chicken, chile ancho, chile cascabel, crema Mexicana, Kenmore, Kenmore Genius Blog, onion, pollo, slow-cooker

Cebollitas asadas

214 · Jun 20, 2011 · 22 Comments

At any parrillada, cebollitas asadas are the one side dish you can count on one s being the same, no matter what kind of meats are chosen for the main dish. These grilled onions are marinated in Maggi and lime juice before being served.

Grilled knob onions with lime and salsa Maggi

I love grilling. The smell of the charcoal, the crackling sound of the fire roasting the food and the anticipation of what’s about to land on my plate. And whenever we grill in Mexico, my suegro (father-in-law) is the king of the barbecue.

Cebollitas asadas are so simple and easy to make (and almost totally impossible to mess up even if you’re not a grilling pro), it’s the single dish that most reminds me of a Sunday parrillada in Mexico.

RELATED RECIPE: Calabacitas con elote

You can add as much or as little lime juice and salsa Maggi, a Worcestershire-style seasoning sauce, or soy sauce as you like – it all depends on your taste buds. The Maggi sold in the U.S. doesn’t taste the same as salsa Maggi sold in Mexico, so I sometimes substitute low sodium soy sauce because we always keep some in the cabinet or the refrigerator.

Not only is this dish often served at barbecues and family gatherings, you can also often find them at little street food stands around Mexico. I especially love to pair this side dish with tacos de rib eye and my Mexican chimichurri-marinated flank steak.

RELATED RECIPE: Calabacitas rellenas

A note for my gluten-free friends: Salsa Maggi contains wheat gluten, wheat and wheat bran among its ingredients. A suitable alternative for you to be able to enjoy this dish is Kikkoman’s gluten-free soy sauce.

Print
clock clock iconcutlery cutlery iconflag flag iconfolder folder iconinstagram instagram iconpinterest pinterest iconfacebook facebook iconprint print iconsquares squares iconheart heart iconheart solid heart solid icon
Grilled knob onions with lime and salsa Maggi

Cebollitas

  • Author: Maura Wall Hernandez
  • Prep Time: 5 minutes
  • Cook Time: 15 minutes
  • Total Time: 20 minutes
  • Yield: 2 servings 1x
  • Category: Side dishes
  • Method: Grilling
  • Cuisine: Mexican
Print Recipe
Pin Recipe

Description

Cebollitas are a classic side dish staple at any Mexican barbecue.


Ingredients

Scale
  • 1 bunch of large spring onions (the kind with the little bulb on the end); these are sometimes called cebollitas cambray or knob onions
  • fresh-squeezed juice of 1/2 to 1 whole lime
  • Salsa Maggi (jugo sazonador) or soy sauce to taste

    Instructions

    1. Wash and grill the onions until they start to get grill marks and the bulbs look mostly cooked through. Leave the green stem tails on. (Some people don’t eat the tails; it’s up to you!)
    2. Once you’ve removed the onions from the grill, put them on a plate or in a bowl and squeeze the desired amount of lime juice over them.
    3. Add desired amount of Maggi or soy sauce over the top and let the onions sit in the juices for a few minutes. Pick up by the stems and eat the bulbs.

      Keywords: onions

      Did you make this recipe?

      Tag @maurahernandez on Instagram and hashtag it #TOSOTT

      Most Popular, Recipe, side dishes, Snacks, Street food, Vegetarian/Vegetariano cebolla, cebollitas, grilling, lime, limón, parrilla, parrillada, salsa de soya, salsa Maggi, soy sauce

      Calabacitas rellenas

      11 · Jun 6, 2011 · 2 Comments

      Calabacitas rellenas: Grilled Mexican green squash, stuffed with chilaca chiles, chorizo and queso fresco. Get the recipe from theothersideofthetortilla.com.

      One of the things I love most about the summer is grilling. It’s an opportunity to do all kinds of different things with meats and vegetables that I don’t get a chance to do during the rest of the year.

      During the spring and summer, my local Mexican markets have a wider variety of produce which means endless combinations for creative dinners at my house. I’ve recently been craving calabacita, a zucchini-like squash that has lighter green speckled skin, and is also one of José’s favorites. As I was strolling through the aisles, I was trying to decide what to stuff them with and as soon as I saw chilaca chiles, I knew that was what I wanted.

      They’re long and skinny with dark green skin, but you may recognize them better when they’re dried – known as chile pasilla. When fresh, they’re mild with a very subtle sweet flavor and you can char and peel them just the same way you do with a poblano.

      This dish is a variation of one that José grew up eating and when I served it for dinner over the weekend, the first thing he said after taking a bite was, “sabe a mi casa.” To me, that’s the ultimate compliment.

      TIPS: If you don’t have a grill or want to make this dish during other times of the year, you can also use a grill pan to cook the calabacitas. You can roast and sweat chilaca chiles in the same way you would with poblano chiles.

      If you’ve never roasted chiles before, check out my tutorial on how to roast poblano chiles.

      This dish can also be made vegetarian-friendly if you substitute soyrizo for the chorizo….

      Read More

      MexMonday, Recipe, side dishes, Snacks calabacita, cebolla, chile chilaca, chorizo, grilling, onion, parrilla, parrillada, queso fresco

      Papas gratinadas

      20 · Feb 7, 2011 · 16 Comments

      To me, wintertime means lots of comfort foods. And pardon the pun, but during the blizzard we had here last week, I was cooking up a storm while I was cooped up inside for three whole days. One of my favorite comfort foods is papas gratinadas, a Mexican version of potatoes au gratin.

      I love it so much, in fact, that while I’m writing this, I’m thinking about going to the store for more potatoes so I can make another batch. The last two times I’ve made this dish, it disappeared in less than 24 hours. And my friend Silvia over at Mamá Latina Tips has been asking me to post this recipe for several weeks since I told her I made it because her mom used to make papas gratinadas for her and it’s one of her favorites, too.

      These are a great side dish (or, um…an afternoon snack) when you need hearty, warm food to keep you full and fueled to fight the cold outside. Here’s a quick video tutorial on how to make this recipe.

      [youtube]http://www.youtube.com/watch?v=3bseuBjSf_Q[/youtube]

      …

      Read More

      How To, Recipe, side dishes, Staple Recipes, Vegetarian/Vegetariano, Video "serrano chile", cebolla, Chihuahua cheese, chile serrano, crema, crema de leche espesa, crema Mexicana, papas, potatoes, queso Chihuahua

      Crock-Pot frijoles de la olla

      189 · Jan 31, 2011 · 7 Comments

      Frijoles de la olla are a staple in Central Mexican cuisine. Traditionally, they’re cooked in a clay pot, but this version is adapted for cooking in a slow-cooker or Crock-Pot.

      There are three types of beans you typically see in frijoles de la olla recipes: frijoles bayos, flor de mayo or pinto beans. Frijoles de la olla made with those type of beans are most common in Central Mexico. All three varieties have a pinkish hue, with pinto beans being the lightest in color among them. These are also the same kind of beans I use for making frijoles charros.

      While individual recipes for frijoles de la olla may vary, they will also often include common ingredients such as onion, garlic, manteca de cerdo (pork lard), salt and hierbas de olor (herbs such as epazote or cilantro that are cooked in with the beans for flavor). Other variations may include different spices such as cumin or bay leaves.

      In Eastern Mexican states such as Veracruz and others bordering the Gulf of Mexico, as well as the South and Southeast states of the country such as Oaxaca, black beans are preferred over bayo, flor de mayo or pinto varieties. Accompaniments may also vary by region to include a fresh squeeze of lime juice, diced onion, chile serrano, chopped cilantro or crumbled fresh cheese.

      Cooking tips for frijoles de la olla

      To prep this dish the night before, add everything to the crock-pot except the liquids, pork neck bones and salt. The next day, add the liquid and pork neck bones and turn on high.

      If you’re planning to let this cook all day while you’re not home, use a slow-cooker that has a timer that will turn the heat off or to a very low “keep warm” setting after the cooking time. You can then add the salt, reheat them for 30-60 minutes in the slow-cooker and enjoy!

      If you don’t have a guajillo chile at home but you have other dried chiles, any other dried red chile you like and have on hand is an acceptable substitute. Just be sure to portion based on the heat factor! Or you can leave the chile out altogether if you prefer.

      For those who like their beans with a thicker stew-like consistency instead of broth, some cooks mash or blend a portion of the beans and then re-add to the pot as the broth cooks down.

      To make this dish vegetarian-friendly, leave out the pork neck bones and use vegetable broth instead of chicken broth.

      This recipe will give you plenty of leftovers, and it’s great as a snack, a side dish, or even a main dish with some garnishes and mix-ins.

      Print
      clock clock iconcutlery cutlery iconflag flag iconfolder folder iconinstagram instagram iconpinterest pinterest iconfacebook facebook iconprint print iconsquares squares iconheart heart iconheart solid heart solid icon
      pinto beans

      Crock-Pot frijoles de la olla

      ★★★★★ 4.3 from 3 reviews
      • Author: Maura Wall Hernandez
      • Prep Time: 15 minutes
      • Cook Time: 6 hours
      • Total Time: 6 hours, 15 minutes
      • Yield: 10 servings 1x
      • Method: Slow-cooker
      • Cuisine: Mexican
      Print Recipe
      Pin Recipe

      Description

      Frijoles de la olla are a staple in Mexican cuisine. Traditionally, they’re cooked in a clay pot over a fire or on the stove, but this version is adapted for cooking in a slow-cooker or Crock-Pot.


      Ingredients

      Scale
      • 2 cups frijoles pintos (pinto beans)
      • 2 cups chicken broth (substitute with vegetable broth for a vegetarian version)
      • 4 cups boiling water
      • 1/2 of a white onion, sliced 1/4 inch-thick
      • 1 chile guajillo
      • 1/2 of a small head of garlic (about 4–6 cloves)
      • 1/2 teaspoon of ground cumin
      • a few pork neck bones (leave these out for a vegetarian version)
      • 2 1/2 teaspoons kosher salt (to be added in last 45 minutes of cooking)

      Instructions


      1. First, rinse your beans under cool water to remove any dirt or debris and get rid of any broken beans. There’s no need to soak the beans overnight!
      2. Layer the onion slices along the bottom of the crock-pot. Place the beans directly over the top of the onions. Tear off the stem of the chile and tuck it into the beans and nestle the pork neck bones in the beans, too. Add the chicken broth. Remove the papery skin from the garlic cloves and place in the crock-pot whole. Add the ground cumin.
      3. You’ll notice the chicken broth isn’t enough to cover the beans and keep all the ingredients moist while cooking. Add 4 cups of boiling water over the top, making sure all the ingredients are under the broth and water and then put the cover on the slow-cooker.
      4. Turn the heat on to high for 5-6 hours (individual slow-cookers can vary slightly in temperature). If the beans start to get dry during cooking, add 1-2 extra cups of boiling water. I only had to add about one cup in the last hour. You can substitute boiling chicken broth in place of the extra boiling water if you like. Add the salt in the last 45 minutes of cooking and stir it in gently to incorporate.
      5. Serve warm.


      Notes

      The beans should be soft to bite and have a nice broth when they’re finished, but shouldn’t be watery.

      Store leftovers in an airtight container in the refrigerator for up to a week.

      Did you make this recipe?

      Tag @maurahernandez on Instagram and hashtag it #TOSOTT

      How To, Most Popular, Recipe, side dishes, Slow-Cooker recipes, Vegetarian/Vegetariano ajo, basic chicken stock, cebolla, chile guajillo, comino, crock-pot, cumin, frijoles de la olla, garlic, kosher salt, onion, pork neck bones, slow-cooker

      CROCK-POT COCHINITA PIBIL

      64 · Jan 24, 2011 · 27 Comments

      Cochinita pibil is a traditional dish from the state of Yucatán that’s cooked in an oven made inside a hole in the ground (called a pib). But did you know you can make a really good version of this dish in a slow-cooker?

      When I found out that January was National Slow-Cooking Month, I knew exactly what recipe I was going to adapt for Crock-Pot cooking. I’ve always wanted to test my theory that cochinita pibil can be done in a slow-cooker, so the fact that it was a nationally recognized month-long culinary holiday-of-sorts was the perfect chance to take on the challenge.

      How to make cochinita pibil in a slow-cooker or Crock-Pot via theothersideofthetortilla.com


      Yes, we’ve posted a recipe here before for cochinita, but let me tell you why this one is different. We’re using a different cut of meat (boneless country-style pork ribs), an easy spice mix made from scratch (no achiote paste in brick-form here), and as with most slow-cooker recipes, you can set it and forget it, making it relatively hassle-free compared to the traditional method of making cochinita pibil.

      If you’re making it for guests, you can still serve it wrapped in warm banana leaves to impress them. Just check out our original recipe for cochinita pibil for directions on how to heat the banana leaves so they’re pliable.

      And finally, we’re not going to serve our cochinita pibil as a taco like you might expect–we’re going to serve them on tostadas.

      This dish can also be served as panuchos by putting the refried black beans inside little tortillas, frying before adding the meat, salsa and any garnishes on top, but trust me when I say store-bought tostadas are going to save you a lot of time. Plus, this recipe is a bit healthier because we’re leaving the frying out. If you can’t find small tostadas or picaditas at your grocery store, you can make your own by either heating corn tortillas in the oven until they’re dry and crispy, or you can get the same result by cooking them longer on your comal.

      But before we move on to the recipe, let’s talk a little about what a slow-cooker (or Crock-Pot) actually is so there’s no confusion because I often get asked if a slow cooker is the same as a pressure cooker. (The answer is no. In fact, they’re opposites.) A slow-cooker is a counter-top electric device that you plug in and usually has a removable glazed ceramic or porcelain pot, surrounded by a heat-conducting housing. They typically have two cooking settings: low or high, and a keep warm setting. Some of the more expensive slow-cookers have more options for controlling the heat as well as a timer with an automatic-shut off.

      The point of a slow cooker is to cook things with steady low, moist heat which makes it ideal for soups, stews and cooking meats that you want to be fork-tender, but without all the fuss of watching it constantly. The lid of the slow cooker typically has a small vent in order to let some of the steam escape and can be removed during the cooking process to stir the ingredients if needed.

      So now that you know the difference, let’s get slow-cooking.

      What marinating the meat looks like:

      Print
      Crock-Pot Cochinita Pibil

      Yield: 3 1/2 cups of meat

      Use your Crock-Pot or slow-cooker for a no-fuss, easy-cleanup variation of a classic Yucatan favorite, cochinita pibil. Tip: Serve on mini tostadas for a perfect party-treat!

      Ingredients

      • Meat and marinade:
      • 1 1/2 pounds country-style boneless pork ribs
      • 1 cup fresh lime juice (about 10 medium-large limes)
      • 3/4 cup fresh orange juice
      • 3 cloves garlic, crushed
      • 1/2 of a large red onion, cut into 1/4 inch slices
      • Spices:
      • 3 tablespoons white vinegar
      • 1 1/2 teaspoon kosher salt
      • 2 1/2 teaspoon ground achiote
      • 1/4 teaspoon freshly ground pepper
      • 1/2 tablespoon olive oil
      • 1 to 1 1/2 teaspoon whole Mexican oregano
      • Salsa:
      • 1/2 of a large red onion, sliced into small strips
      • juice of 1 large orange
      • juice of 2 large limes
      • 1 roasted habanero chile, finely chopped
      • For tostadas:
      • 1 package of small tostadas or picaditas
      • 1 cup refried black beans

      Instructions

      1. THE NIGHT BEFORE: MARINATING THE MEAT - Start by squeezing the fresh lime juice and orange juice. Once you have the juice, put it in a medium to large glass bowl and add the crushed garlic. It's important to use glass rather than metal/stainless steel or plastic because glass is non-reactive and non-corrosive.
      2. Combine all the dry spices and mix well; then add vinegar and olive oil. Stir to incorporate the liquids and add to the glass bowl with the citrus juices and garlic. Stir well and add the pork to the bowl, making sure it’s completely covered by the juice. Cover and allow it to marinate overnight in the refrigerator.
      3. Making the salsa: Slice 1/2 of a large red onion into small strips and mix it with the juice of 1 orange and 2 limes. Roast one habanero on your comal or in a skillet, remove the stem (and seeds if you want to reduce some of the heat), and finely chop. Add the habanero to the salsa. Store in an airtight container in the refrigerator overnight.
      4. THE DAY OF: Slice the remaining half onion into quarter-inch thick slices and place them on the bottom of the crock-pot. Remove the meat and marinade from the refrigerator and place the meat over the onions. Pour all the juice over the meat.
      5. Place the lid on the crock-pot and cook on high for 5 hours (or on low for 8-9 hours). You should NOT rush and cook this recipe on high heat for half the time - it doesn't work that way! You'll end up with tough meat.
      6. You’ll know it’s finished cooking when you remove a piece of meat from the crock-pot and can shred it with a fork without much effort. Shred all the pork. Place the meat in a bowl and add a little juice from the Crock-Pot to keep the meat moist.
      7. Heat the tostadas in the oven at 200º F for a few minutes. Spread warm refried black beans on the tostadas. Add the shredded pork on top of the beans and spoon some of the habanero salsa and onions on top of the pork.
      3.1

      https://theothersideofthetortilla.com/2011/01/crock-pot-cochinita-pibil-panuchos-yucatecos/

      ©2009-2015 theothersideofthetortilla.com

      Meat, Plato fuerte/Main dish, Recipe, Slow-Cooker recipes, Yucatán cebolla, cochinita pibil, crock-pot, habanero, slow-cooker, Yucatán

      ENCHILADAS VERDES

      2 · Dec 28, 2010 · 3 Comments

      Last month at my cooking show at the Kenmore Live Studio where I made chilaquiles, I talked about the versatility of salsa verde. I can think of about a dozen uses for this sauce just off the top of my head, so when I make it, I usually make extra so that I can get a few different meals out of it. One of my favorite things to make with salsa verde is enchiladas.

      This recipe is so easy to make; great whether you need to feed just a few or a whole family. A few weeks ago, I made these enchiladas for my suegro and he ate three helpings! I laughed and asked him whether they were that good or if he was very hungry and as he was about to take another bite, he said “both!” These are also a favorite of José’s.

      If you want to make these vegetarian, you can substitute vegetable broth for the chicken broth in the salsa and fill them with cheese instead of chicken.

      RECETA:

      ENCHILADAS VERDES

      FOR SALSA VERDE

      • A little over 1 pound of small tomatillos, husked & thoroughly washed
      • 3-5 serrano chiles (depending how spicy you like it), stems cut off and roughly chopped
      • 1-2 cloves of garlic
      • 1-2 slices of white onion
      • A pinch or two of salt to taste
      • 1-1 ¼ cup chicken broth or water

      FOR THE ENCHILADAS

      • 3 cups shredded chicken (2 chicken breasts and some dark meat)
      • 6-7 oz (about ¾ cup) of shredded Chihuahua cheese
      • ½ cup crema Mexicana
      • A dozen corn tortillas
      • Some canola oil for frying the tortillas

      To make the salsa:

      First, husk and wash the tomatillos. Rinse them well in cool water.

      Fill a pot with water (large enough to fit all the tomatillos) and bring to a boil. Put the tomatillos in and cook in the boiling water until the tomatillo flesh begins to get transparent. Using a slotted spoon, transfer the tomatillos to a blender. Add the onion, garlic and salt. Cut the stems off the serrano chiles and cut each chile into a few pieces so they’re easily chopped in the blender.

      Start by adding 2 chiles to the blender with about ¾ of a cup of water or chicken broth and blend on high until smooth and the chiles and tomatillos are completely incorporated. Taste the salsa to see if it’s too hot; if it needs more chile, add them one at a time, blending & tasting the result until you are happy with the level of heat from the chiles. If it seems the salsa is not quite liquid enough, add another ¼ cup of water or chicken broth. The salsa will reduce slightly when cooked.

      Pour blender contents into a saucepan and cook over medium heat until the salsa boils, occasionally stirring. Remove from heat.

      For more on salsa verde, visit my original post on the topic.

      You can either make a bone-in chicken breast from scratch or use a store-bought rotisserie chicken if you’re short on time. For bone-in chicken breast and chicken stock, you can just gently boil the chicken on the stove with a pinch or two of salt, a slice of onion and a small spring of cilantro or a few epazote leaves until the meat is cooked through. If you use a rotisserie chicken, buy one that’s low-sodium or barely seasoned. You can pour the juices from the container into a saucepan with a few cups of water and a chicken leg or two.

      To make the enchiladas:

      Preheat the oven to 350º F (177º C).

      Heat a little bit of oil in a frying pan (just enough to coat the bottom of the pan) and lightly fry both sides of the tortilla. Each side will dome up when it’s ready to be turned. Drain on paper towels. Put a bit of the shredded chicken in the center of each tortilla and add a generous pinch of the shredded Chihuahua cheese. Roll them up and place seam-side down in a baking dish.

      Spread the crema liberally over the top of the enchiladas and then ladle some salsa over them. Sprinkle the remaining cheese over the top and heat in the oven at 350º for 8-10 minutes to heat through. Then move to the top rack and broil on low until the cheese is completely melted and bubbly, with some brown spots. Remove from the oven. Using a spatula, transfer enchiladas to plates and finish with some extra salsa on top.

      Yields 12 enchiladas. There will be some leftover salsa.

      • How do you like your enchiladas?

      Plato fuerte/Main dish, Poultry, Recipe, Salsa, Staple Recipes ajo, basic chicken stock, caldo de pollo, canola oil, cebolla, chicken, Chihuahua cheese, chile serrano, crema Mexicana, enchiladas, garlic, onion, pollo, queso Chihuahua, tomatillo, tortilla

      Albóndigas en salsa chipotle

      17 · Oct 12, 2010 · 19 Comments

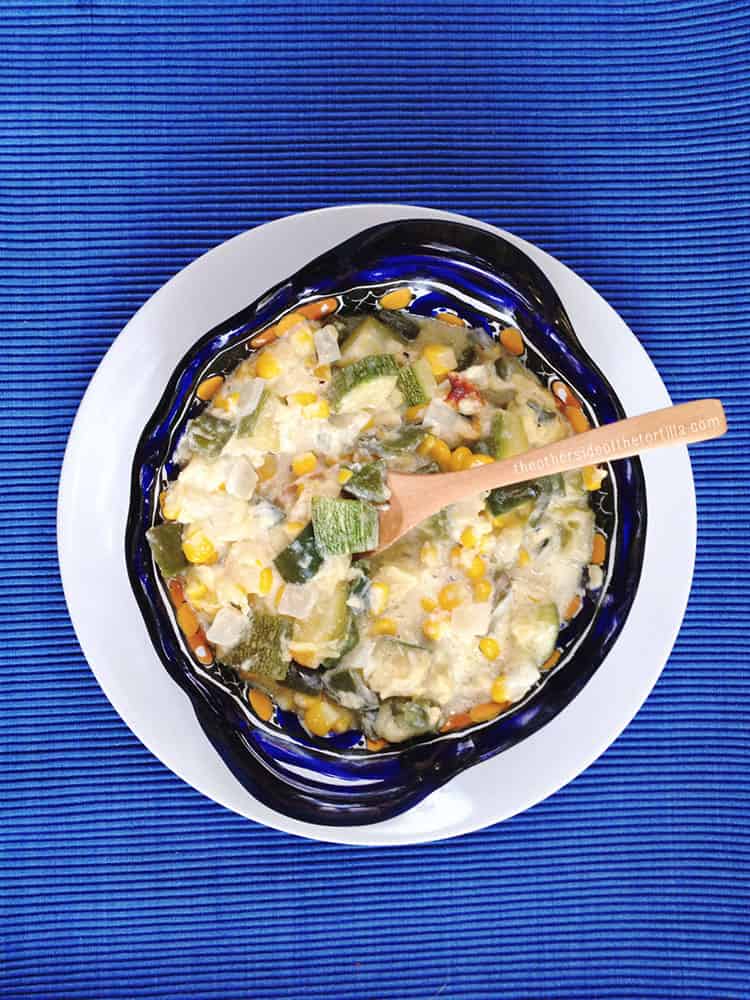
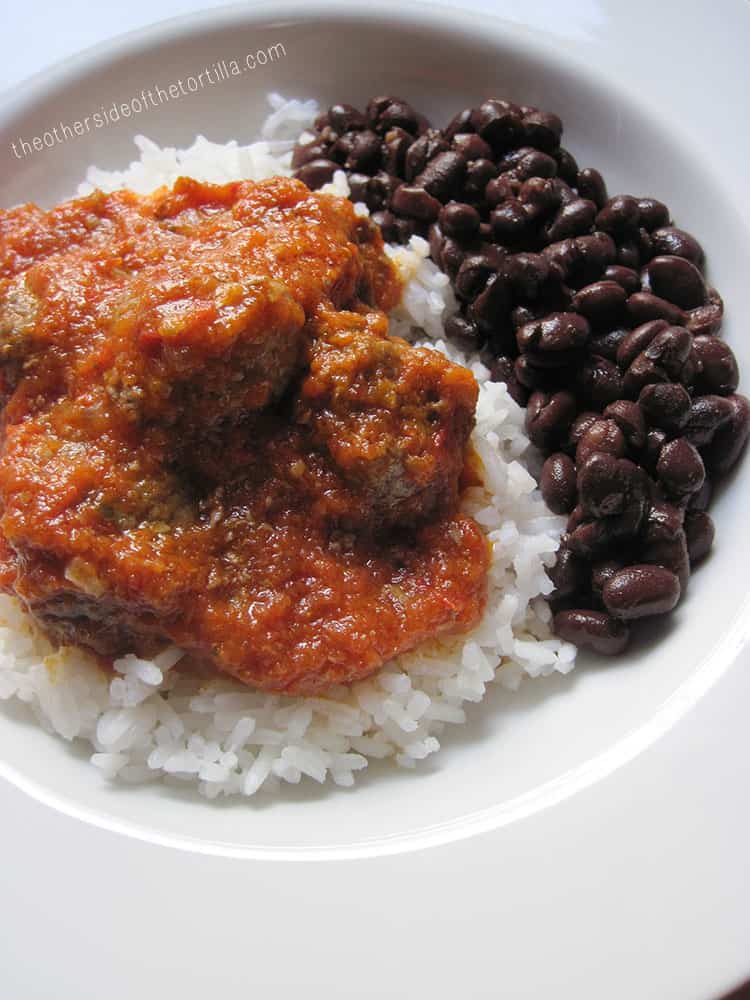
      Albóndigas are a simple Mexican comfort food, easy to make and even easier to eat. I always serve these Mexican meatballs in a tomato chipotle sauce. Some people like to make their albóndigas bigger so they can accommodate a whole egg filling on the inside. My husband only likes them without egg, so I finally learned this recipe from our family friend, Esmeralda. It’s an easy but traditional Mexican dish sure to please the whole family.
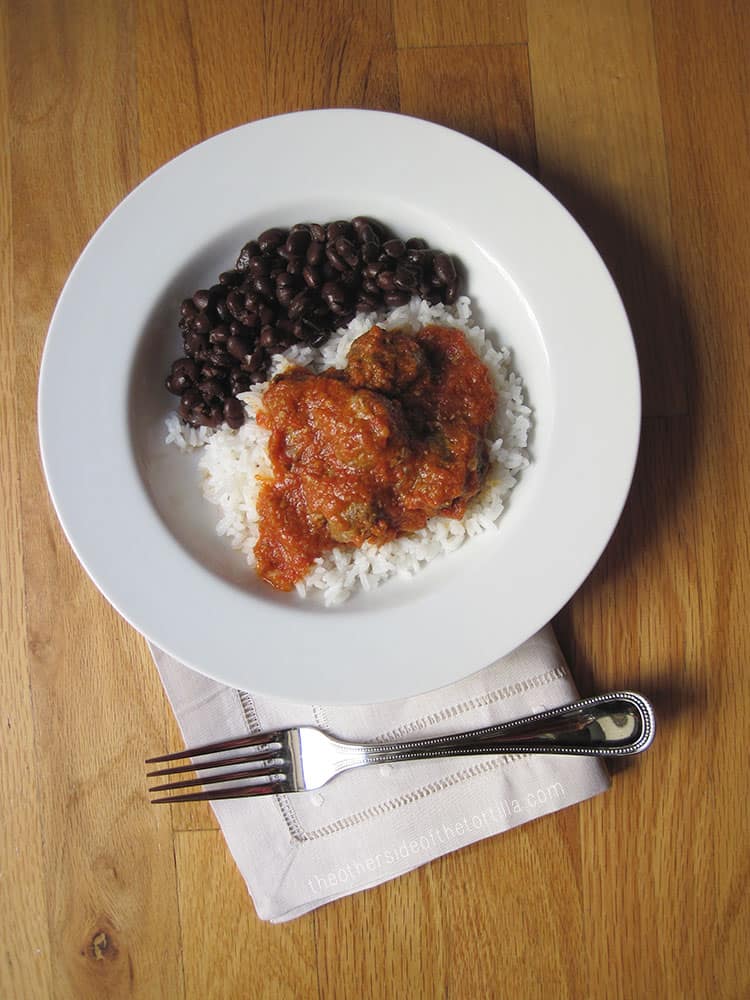
      A classic recipe for albóndigas al chipotle, a Mexican meatball dish with a tomato-chipotle sauce. Recipe via theothersideofthetortilla.com.

      This past weekend I had the pleasure of speaking at the Blogalicious Weekend conference at the Ritz-Carlton South Beach in Florida. I had an absolutely incredible time and was inspired by so many of the women I met.

      The kind folks at Kenmore hosted a pop-up kitchen at the conference and invited me several weeks ago to do a cooking demo using their kitchen. There was one challenge: I had to choose a recipe that could be made only using small appliances.

      I thought for several days about what I could make with only access to a blender, a convection toaster oven, a toaster, a stand mixer, an induction pad, a food processor, a coffee maker or teakettle and a slow cooker. It was a tough decision because I really wanted to make rajas con crema, but without a sink and an oven, I didn’t think I could pull it off.

      A few weekends ago, my mom was foraging through my refrigerator looking for a snack and I ended up giving her some albóndigas (meatballs) over rice. She loved them so much that she gobbled up the last of what little was left in a Tupperware from a few nights before.

      The next day at 7 a.m. – a Sunday – my mom called to tell me she’d been up all night thinking about albóndigas and that she needed my recipe so she could make them herself that day. Seldom in my life has my mom, who is an amazing cook, called me for a recipe – it’s always me calling her. That’s when I decided if they were good enough for mom to call me at 7 a.m. on a Sunday and risk waking me up on the one day a week that I like to sleep in, then the Blogalicious crowd would surely love this recipe, too. If you weren’t able to see it live in Miami, check out the video below of the cooking demo from start to finish.

      A classic recipe for albóndigas al chipotle, a Mexican meatball dish with a tomato-chipotle sauce. Recipe via theothersideofthetortilla.com.

      [youtube]http://www.youtube.com/watch?v=CGOeny70SdQ&feature=channel[/youtube]
      …

      Read More

      Meat, Plato fuerte/Main dish, Recipe, Video arroz, black beans, Blogalicious, carne molida, cebolla, chipotle en adobo, egg, Esmeralda, frijoles negros, ground beef, huevo, jitomate, onion, pepper, pimiento, rice, sal, salt, tomatoes

      Sopa de fideo

      427 · Mar 8, 2010 · 27 Comments

      I’m sharing my sopa de fideo recipe because this tomato-broth and noodle soup is a comfort food for me that evokes one specific fond memory.

      After more than a decade of dreaming about visiting Teotihuacan, I finally made the 40-kilometer trip northeast of Mexico City in 2009 with my suegro and my cuñada. I yearned to visit this archaeological site since I first learned about it in history books as a kid. The Aztec pyramids fascinated me and I never dreamed I’d be able to travel there, let alone make it all the way to the top of the Pirámide del Sol.

      How to make Mexican sopa de fideo from scratch via theothersideofthetortilla.com

      RELATED RECIPE: Tomato chipotle soup with star pasta…

      Read More

      Most Popular, Recipe, Soups, Stews, Caldos, Sopas y Guisados ajo, Aztecs, caldo de pollo, cazuela, cebolla, Ciudad de México, fideos, garlic, jitomate, Mexico City, noodles, onion, pasta, Pirámide del Sol, Pyramid of the Sun, sieve, Sopa, sopa de fideo, soup, Teotihuacan, tomatoes

      Rajas con crema

      204 · Feb 8, 2010 · 20 Comments

      Rajas con crema, a hearty dish made with poblano chiles, onion, crema mexicana and a little bit of cheese, is a favorite in my house. As one friend put it, “anything that comes out of your kitchen at least once a week has got to be good.”

      Rajas are particularly popular in central and Southern Mexico, and are so versatile I’ve seen them served as breakfast, lunch and dinner. I can’t speak for all of Mexico, but at least in Mexico City when someone is talking about rajas, they are usually talking about strips of poblanos or this dish specifically.

      rajas con crema

      According to my husband, José, rajas con crema are the best when the poblanos have a spicy bite, but they’re not too hot. Usually you can tell how hot the poblanos are when you’re removing the seeds after roasting because the heat will burn your skin and if you breathe in too deeply, you might cough. In that case, you may want to soak them in a solution of vinegar and water so they’re not too spicy. If those two things don’t happen, sometimes I skip the vinegar and water soak after roasting the chiles. However, f you soak them too long, the chiles are a little sweet rather than spicy but still delicious nonetheless.

      If you’ve never prepared rajas before, you’ll want to first read my tutorial on how to roast poblano chiles before you skip to the directions below.

      Some rajas con crema recipes call only for cream, and lots of it; others call for so much cheese that it’s more of a queso fundido in disguise. Mexican sour cream isn’t actually sour like American sour cream; it has a less acidic taste and a thinner consistency. The cheese should melt slowly and not be gooey, and it should be barely visible once incorporated. It’s really more of a bonding agent so the cream doesn’t get soupy.

      RELATED: Vegetarian queso fundido with rajas

      My version, based on a recipe José grew up eating, strikes a perfect balance. Some people like to eat rajas con crema over rice, or as a side dish with meat like carne tampiqueña (a grilled filet or skirt steak) or cecina (a thinly-cut aged salted beef). In our house, as you may already be fully aware if you’re a regular reader, the taco is king. However you decide to serve it, though, I guarantee it won’t be long before you’re making it again.

      chiles poblanos asados

      We like to serve rajas in corn tortillas as tacos. Sometimes I make cecina to accompany the rajas but they can stand up as a vegetarian meal on their own or as a hearty side with rice, beans, meat or whatever else you’d like.

      RELATED: How to roast poblano chiles

      Print

      Rajas con crema

      Author Maura Wall Hernandez

      Yield 12 servings

      Rajas con crema is a hearty dish made with poblano chiles, onion, Mexican sour cream and a little bit of cheese. It's used as a taco filling or served as a side dish.

      Ingredients

      • 5-6 poblano chiles, roasted, skinned and cut into strips
      • 1/2 of a large white onion, sliced into rings and then cut in half (to make half moon strips)
      • 2 tablespoons salted butter (do not substitute margarine)
      • 5 ounces crema Mexicana
      • 1/2 of coarsely shredded Chihuahua cheese
      • A pinch of kosher salt, or more to taste

      Instructions

      1. Roast poblano chiles. Allow them to sweat for 15 minutes, then peel off the skins, remove seeds and cut into strips. 
      2. Using a deep skillet, melt the butter and cook the onions in the butter on medium-low heat until they start to change color and caramelize a bit (slightly transparent and a little brown). Turn off burner and remove pan from heat.
      3. Add the chile strips (rajas) in the pan with the onion, stir to coat well with the remaining butter, and warm over medium heat until the rajas are warm and a little wilted.
      4. Add about 5 ounces of crema and stir in well. Cook for about 2-3 minutes and then reduce heat to low and add a half cup of coarsely grated Chihuahua cheese (if you can't find cheese labeled Chihuahua, any cheese labeled "queso para fundir" will do). The cheese should melt slowly and not be gooey, and it should be barely visible once incorporated. It’s really more of a bonding agent so the cream doesn’t get soupy. Once the cheese is melted, turn your burner as low as it will go, just so it is on to keep the rajas warm.

      Notes

      Leftovers can be stored in an airtight container in the refrigerator for up to 5 days, and reheated on the stove over medium heat or in the microwave at 30-second intervals.


      Plato fuerte/Main dish, Recipe, side dishes, Vegetarian/Vegetariano butter, cebolla, cheese, chile poblano, crema Mexicana, mantequilla, onion, Poblano pepper, queso Chihuahua

      SOPA DE TORTILLA

      4 · Nov 22, 2009 · 4 Comments

      I love tortilla soup. I will order it just about anywhere, at any time of year, and I’ve been known to judge the entire menu of a restaurant solely on the quality of their sopa de tortilla. I’m obsessed in every sense of the word–and having not been able to find a version I deem delicious in Chicago, I learned how to make it.

      This soup is very representative of a typical Mexican kitchen and uses the traditional flavors and textures of the tomato, chile, avocado, epazote and tortilla. I’ve never cared much for tomato-based soups or broths, but this soup converted me.

      The secret, I’ve found, is adding a few crunchy little pieces of chicharrón (also known as pork rinds or cracklings here in the U.S.). They add a depth to the soup’s flavor that I’m convinced cannot be achieved otherwise. All of my favorite places in Mexico for tortilla soup serve it similarly; all the ingredients for assembling the soup are brought to the table separately and the waiter puts it together right in front of you, almost like a little show with your meal….

      Read More

      Soups, Stews, Caldos, Sopas y Guisados, Staple Recipes aguacate, ajo, avocado, basic chicken stock, caldo de pollo, cebolla, chicharrón, chile pasilla, crema de leche espesa, epazote, garlic, jitomate, onion, queso cotija, queso fresco, sopa de tortilla, tomate, tortilla soup

      SALSA VERDE (Cooked and Raw)

      22 · Aug 30, 2009 · 9 Comments

      Tomatillos GAL
      tomatillos milperos

      Salsas are the lifeblood of just about every Mexican dish. They can be cooked or raw, made in the blender or in a molcajete. Salsa can make or break any dish, add a special dimension of flavor or even make a dish edible (you wouldn’t eat chicharrón without cooking it in salsa to soften the dried meat).

      The simple combination of tomatoes (jitomate or tomatillos/red or green), chiles (of any variety) and other ingredients like onion, garlic and spices is essential to many traditional dishes in Mexican cuisine. Salsa verde is certainly a staple in my house, whether it’s cooked and used for guisados like chicharrón en salsa verde, or raw salsa used for garnishing tacos.

      You’ll notice this same cooked salsa recipe will be used over and over again in a number of dishes you’ll read about here and I’ll reference back to it often and sometimes modify it (for example, when making chilaquiles, I substitute fresh chicken stock in place of water).

      In Mexico, we’ve eaten similar recipes to mine at many of our favorite restaurants, though some places use epazote in their cooked salsa (an ingredient I don’t use). In Chicago, we haven’t found a place that makes salsa verde the way we like it—or anywhere near it, really. Because of this, we sometimes order take out from our favorite Mexican restaurants and bring it home to eat it with our own homemade salsa.

      Chile Serrano WEB
      chiles serranos


      Print
      Salsa verde (cooked)

      Prep Time: 10 minutes

      Cook Time: 15 minutes

      Total Time: 25 minutes

      Salsa verde (cooked)

      How to make Mexican cooked green salsa.

      Ingredients

      • A little over 1 pound of small (milpero) tomatillos, dehusked & thoroughly washed
      • 3-6 serrano chiles (depending how spicy you like it; start with less and add them to increase heat), stems cut off
      • 1-2 cloves of garlic
      • 2 1/4-inch slices of white onion
      • A big pinch of Kosher salt

      Instructions

      1. First, remove the husks and wash the tomatillos well. You’ll notice they’re sticky, which is a sign of ripeness, and probably slightly dirty under the husk. Sometimes I find that warm water isn’t enough, and I use a few drops of dish soap diluted in a bowl of warm water. Then I put the husked tomatillos in the bowl and gently rub each one in the slightly soapy water to remove the dirt and sap. Rinse them well in cool water to remove any soap residue.
      2. Fill a pot with water (large enough to fit all the tomatillos) and bring to a boil. Put the tomatillos in and cook in the boiling water until the tomatillo flesh begins to get transparent.
      3. Using a slotted spoon, transfer the tomatillos to a blender. Add the onion, garlic and salt.
      4. Cut the stems off the serrano chiles and cut each chile into a few pieces so they’re easily chopped in the blender. Start by adding 2 chiles to the blender with about ¾ of a cup of water and blend on high (liquify or puree) until smooth and the chiles and tomatillos are completely incorporated. Taste the salsa to see if it’s too hot; if it needs more chile, add them one at a time, blending & tasting the result until you are happy with the level of heat from the chiles.
      5. If it seems the salsa is not quite liquid enough, add another ¼ cup of water. The salsa will reduce slightly when cooked.
      6. Pour blender contents into a saucepan and heat over medium flame until the salsa boils, occasionally stirring. Remove from heat and allow to cool before storing in an airtight container in the refrigerator.

      Notes

      Stores well in the refrigerator in an air-tight container for about 10 days.

      3.1

      https://theothersideofthetortilla.com/2009/08/salsa-verde/

      ©2009-2015 theothersideofthetortilla.com

      Tip: for extra flavor with salsa verde cocida, you can also add 2 strips of chicharrón (with meat still attached) to season the salsa. You should add the chicharrón during the end stage when you cook the salsa until it boils for a few minutes, then remove from heat and allow to come to room temperature before storing to infuse the chicharrón flavor. This flavor infusion method only works with the cooked salsa.

      Print
      Salsa verde cruda (raw green tomatillo salsa)

      Prep Time: 15 minutes

      Salsa verde cruda (raw green tomatillo salsa)

      How to make Mexican salsa verde cruda (raw tomatillo green salsa)

      Ingredients

      • A little over 1 pound of small (milpero) tomatillos, dehusked & thoroughly washed
      • 3-6 serrano chiles (depending how spicy you like it; start with less and add them to increase heat), stems cut off
      • 1-2 cloves of garlic
      • 2 1/4-inch slices of white onion
      • A big pinch of Kosher salt

      Instructions

      1. First, remove the husks and wash the tomatillos well. You’ll notice they’re sticky, which is a sign of ripeness, and probably slightly dirty under the husk. Sometimes I find that warm water isn’t enough, and I use a few drops of dish soap diluted in a bowl of warm water. Then I put the husked tomatillos in the bowl and gently rub each one in the slightly soapy water to remove the dirt and sap. Rinse them well in cool water to remove any soap residue.
      2. Put the raw tomatillos directly into the blender with all other ingredients. Add the chiles to taste, starting with 2 and adding more if necessary. If it's too dry, add a few tablespoons of water to the ingredients and blend well until smooth.
      3. Serve immediately and store any leftovers in an air-tight container in the refrigerator for up to 3 days.

      Notes

      Stores in an air-tight refrigerated container for up to 3 days.

      3.1

      https://theothersideofthetortilla.com/2009/08/salsa-verde/

      ©2009-2015 theothersideofthetortilla.com
      • What do you do differently in making your salsas verdes or where is your favorite place to eat a dish that includes salsa verde?

      Chiles, Salsa, Staple Recipes ajo, cebolla, chile serrano, garlic, onion, tomatillo

      Primary Sidebar

      ¡Bienvenidos!

      Hi, I'm Maura Hernández. Welcome to my kitchen! I'm an award-winning food and travel blogger, recipe developer, and former journalist sharing my passion for all things Mexico. Married to a Chilango, I've traveled Mexico extensively over the last 15 years. Here, you'll find a mix of traditional and modern Mexican cooking, along with my advice on where to eat, stay and play on your visit to Mexico! READ MORE

      New recipes, fresh travel tips + more

      Delivered straight to your inbox!

      Copyright © 2023 The Other Side of the Tortilla on the Cravings Pro Theme