• Skip to primary navigation
  • Skip to main content
  • Skip to primary sidebar

The Other Side of the Tortilla

  • HOME
  • ABOUT
    • CONTACT ME
    • FAQ
    • PRESS
    • PRIVACY POLICY
    • MEDIA KIT
    • ADVERTISE
  • RESOURCES
    • BOOKS
    • SHOP
    • INGREDIENTS
    • KITCHEN TOOLS
    • Thanksgiving
    • Mexican Christmas Traditions
  • RECIPES

chile poblano

Queso fundido potato skins

2 · Mar 13, 2015 · 3 Comments

This post is part of a compensated campaign with Farmland® and Latina Bloggers Connect. All opinions and the recipe here are my own.

Queso fundido potato skins are a sinful snack perfect for any party or game day. Or even a random Saturday when you just want a savory, meaty, cheesy snack.

I usually serve queso fundido with tortillas (mostly corn tortillas, but sometimes flour) or hearty tortilla chips. But I’ve had a penchant lately to meld together my Mexican favorites with my American favorites, which is what prompted me to create these queso fundido potato skins.

RELATED RECIPE: Queso fundido with chorizo
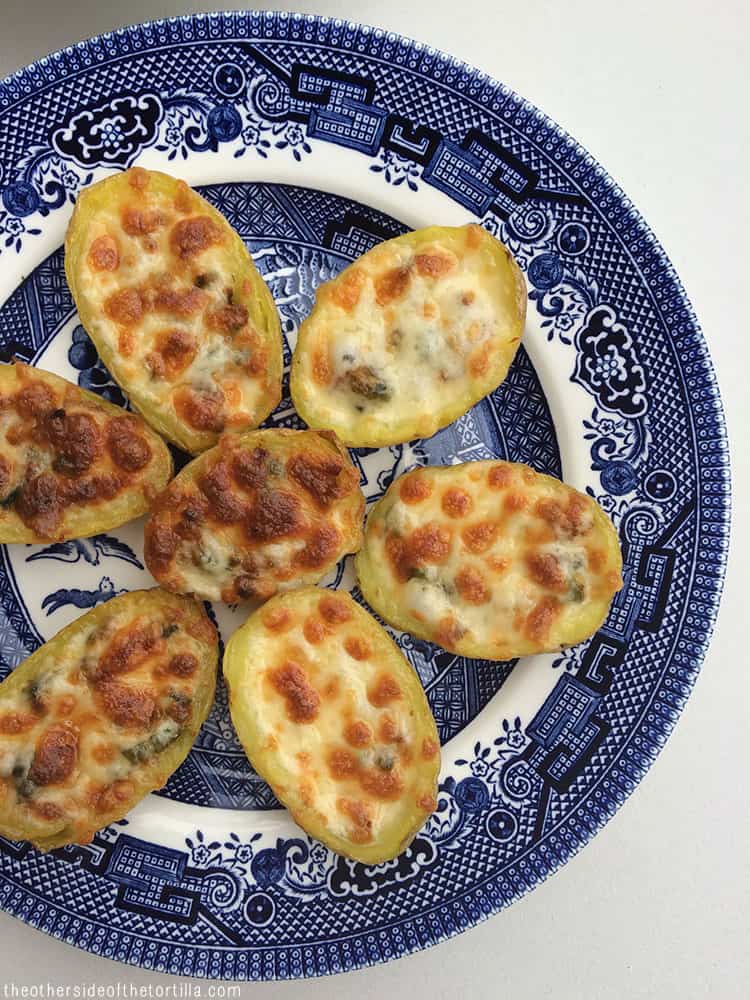
Queso fundido potato skins via theothersideofthetortilla.com…

Read More

Recipe, Snacks, Sponsored bacon, chile poblano, chorizo, queso Chihuahua, queso Quesadilla

Vegetarian Queso Fundido

15 · Nov 21, 2013 · Leave a Comment

Queso fundido is an easy dish, made with melted cheese and toppings served dip-style, that even the most inexperienced home cook can make.

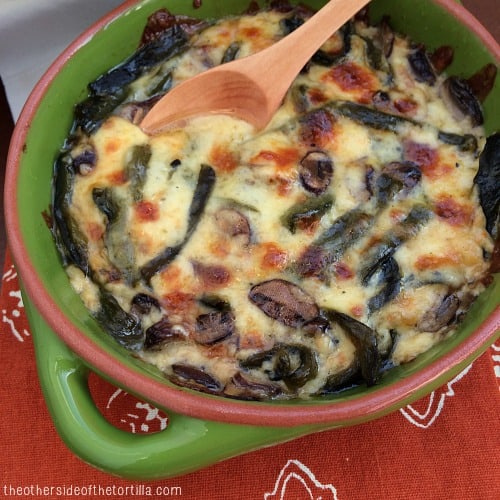
This vegetarian queso fundido with rajas de chile poblano (roasted poblano pepper strips) and mushrooms is super easy and can be doubled, tripled or quadrupled depending on the amount of guests you need to serve.

I share this because with the holidays approaching, menu planning can be stressful and even if you’re great in the kitchen, you may have some helping hands that are not. This recipe is so easy that it’s hard to mess up.

vegetarian queso fundido recipe

This post is part of a compensated campaign from Latina Bloggers Connect and Cacique but all opinions and this recipe are my own.

How to serve vegetarian queso fundido

Alongside a basket of warm tortillas—your choice whether they’re corn tortillas or flour tortillas—this appetizer dish will definitely please any crowd.

If you’re ambitious and have a little extra time on your hands, you can even make your own homemade chorizo to add to your queso fundido if you’re not worried about keeping this dish vegetarian. Or substitute soy chorizo!

But who says you only have to serve queso fundido with tortillas? You can also use tortilla chips, tostadas, or even served as queso fundido potato skins!

For big chile poblano fans, you should also try rajas con crema, which is similar to queso fundido in that there’s lots of cheese and it can be eaten in a tortilla or on a chip or tostada.

Print
clock clock iconcutlery cutlery iconflag flag iconfolder folder iconinstagram instagram iconpinterest pinterest iconfacebook facebook iconprint print iconsquares squares iconheart heart iconheart solid heart solid icon
vegetarian queso fundido with rajas de chile poblano and mushrooms

Vegetarian Queso Fundido

  • Author: Maura Wall Hernandez
  • Prep Time: 30 minutes
  • Cook Time: 15 minutes
  • Total Time: 45 minutes
  • Yield: 4 servings 1x
  • Category: Snacks
  • Method: Baking
  • Cuisine: Mexican
Print Recipe
Pin Recipe

Description

Vegetarian queso fundido is an easy antojito (appetizer) to please any crowd! Great for holiday parties!


Ingredients

Scale
  • 5 ounces queso Chihuahua or queso quesadilla
  • 2 small poblano chiles, roasted, seeded, skin removed and cut into strips
  • 1/2 cup sliced white mushrooms
  • 1/4 teaspoon kosher salt

Instructions

  1. Prepare your chiles first. Here’s my tutorial how to roast poblano chiles. This can be done as long as two days ahead of time (just store the chiles in the refrigerator if you prepare in advance).
  2. Shred the cheese into a bowl and set aside.
  3. Slice the mushrooms and poblano chiles, and toss together with 1/4 teaspoon of kosher salt.
  4. Combine the mushroom and chile mixture with the cheese and put it into an oven-proof dish or casserole dish.
  5. Bake at 400ºF for 10 minutes, then heat under the broiler until all the cheese is melted and it starts to get bubbly and form some brown spots.
  6. Serve immediately with warm tortillas, chips or tostadas.

Notes

Prep time includes the time to roast, sweat and devein the poblano chiles.

Keywords: queso fundido, vegetarian

Did you make this recipe?

Tag @maurahernandez on Instagram and hashtag it #TOSOTT

Looking for more vegetarian Mexican recipes? Try these!

Mexican Vegetarian Meals
Poblano chile, mushroom and onion vegetarian tacos
Crema de elote

Mexican Vegetarian Side Dishes
Arroz poblano

Mexican Vegetarian Snacks
Roasted chickpeas with Tajín
Pellizcadas (mini sopes)
Guacamole hummus
Roasted jalapeño hummus

Recipe, Snacks, Sponsored, Vegetarian/Vegetariano chile poblano, hongos, mushrooms, queso fundido, queso Quesadilla

Calabacitas con elote

10 · May 22, 2013 · 3 Comments

This is a sponsored post in collaboration with Latina Bloggers Connect and the California Milk Advisory Board.  The recipe and opinions are my own.

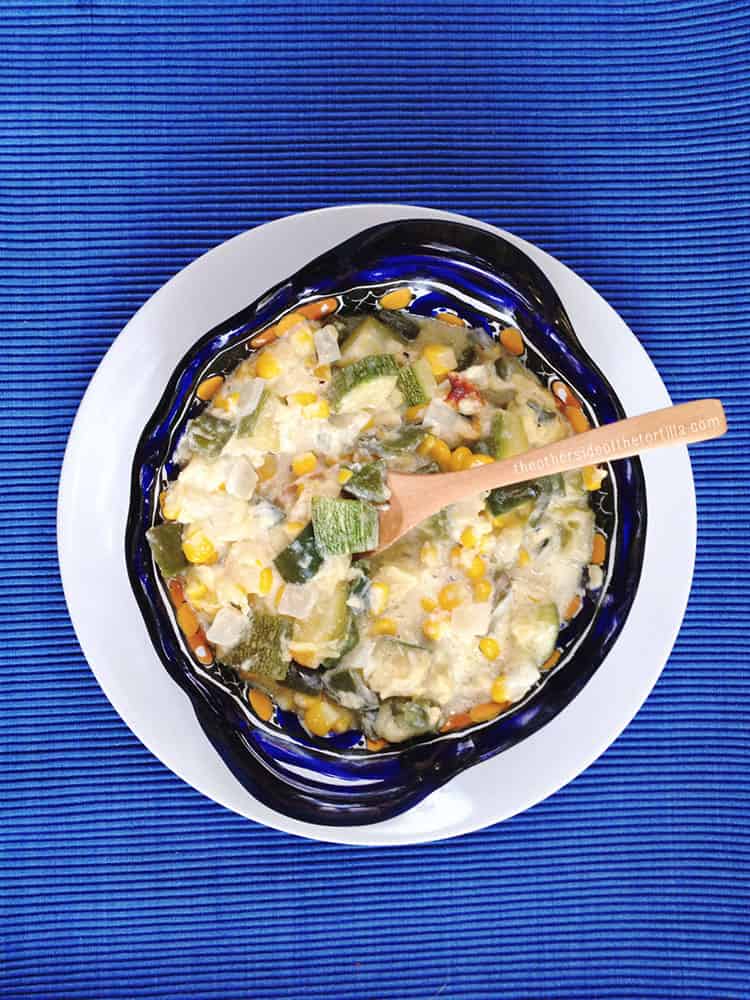
Calabacitas con elote is a traditional Mexican side dish, typically baked in the oven in a casserole dish or olla de barro. But I’m giving it a summer makeover by cooking it in easy-to-make foil packets for the grill.

Calabacitas con elote is a traditional Mexican side dish, typically baked in the oven in a casserole dish or olla de barro. Give the dish a makeover by cooking it in easy-to-make foil packets for the grill.  Recipe via theothersideofthetortilla.com

We’re spending tons of time outside with family and friends now that summer grilling season is here and this is a great dish to take to any parillada! This vegetarian dish is one of my favorites for serving as a quick dinner side dish as well as for taking to parrilladas (barbeques) that are typically full of meats but lacking enough veggies. If I’m making it for just the two of us, I refrigerate half the recipe and grill it later in the week so that it’s fresh off the grill at dinnertime.

Now that we live in California and have such a variety of fresh, local dairy, produce and meats available to us year-round thanks to the climate, I’ve been consciously trying to eat more locally (and by that, I mean seeking out locally grown produce at the farmers markets and other foods made in my new home state). California is the country’s leading producer of Hispanic dairy products, which are sold nationally, and is the nation’s second largest producer of cheese. In fact, California produces more than 25 kinds of Hispanic cheeses and many other dairy products. A Real California Milk seal means your dairy products are made from 100 percent California milk.

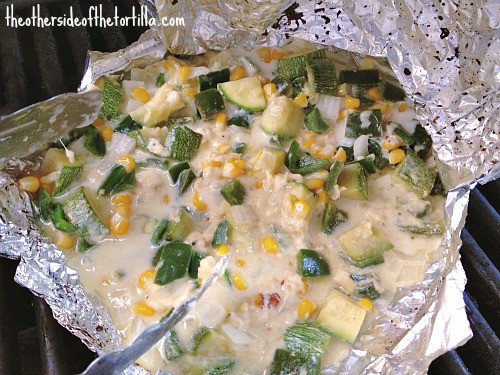
This is what the calabacitas should look like inside the foil packet when it’s done or almost done cooking:

calabacitas_con_elote_grill_packet_TOSOTT…

Read More

Recipe, Sponsored, Vegetarian/Vegetariano calabacita, California Milk Advisory Board, cebolla, chile poblano, corn, crema Mexicana, elote, grilling, onion, parrilla, parrillada, queso Chihuahua, queso Quesadilla, receta vegetariana, vegetables, vegetarian

Alambre de la Patrona

18 · Mar 29, 2013 · 4 Comments

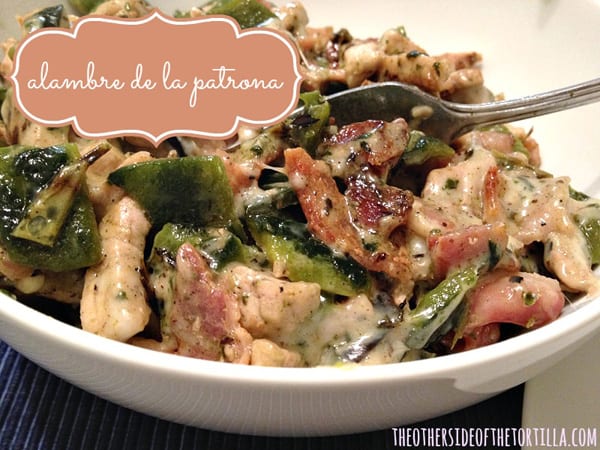
This taco de alambre recipe is a Mexico City-style taco made with thinly sliced pork, bacon, chile poblano, onion and cheese.

I haven’t written much here about my favorite taquería in Chicago, La Lagartija, but have always widely recommended the place to anyone who asked me in person, on Facebook or Twitter about where to get an authentic Mexican meal in my hometown. I wasn’t exactly trying to keep it a secret, but it’s definitely a gem and I always appreciated the neighborhood charm and the way that the meseras and owners always remembered us and greeted us like family. I have so many photos of memorable meals we ate there, and it was the only place in Chicago where we’d regularly eat tacos al pastor.

RELATED RECIPE: Slow-cooker carnitas

But one of my favorite standby meals there, the alambre, is both succulent and super easy to recreate at home. This recipe is my own spin on one of their alambres. The owners are from Mexico City, and the dish on their menu is actually a version of a popular dish at one of our favorite taquerías in Mexico City, El Charco de las Ranas. This dish is also sometimes known as alambre de chuleta and is best served with warm tortillas, but you can skip the tortillas if you like and just eat it with a fork.

alambre_de_la_patrona_tacos…

Read More

Finding Mexico in Chicago, Meat, Plato fuerte/Main dish, Recipe, Tacomiendo "El Charco de Las Ranas", bacon, cebolla, Chicago, chile poblano, La Lagartija Taquería, Mexico City, onion, pork, puerco, tocino

Arroz poblano

11 · Nov 12, 2012 · 5 Comments

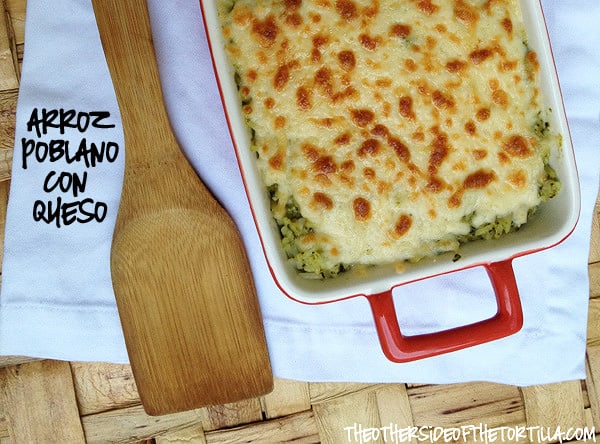
With the cold weather and the holidays approaching, I can think of nothing but comfort food. Arroz poblano is a staple comfort food in my home during the winter months and is a filling dish that can be served as a side or even as a vegetarian meal. Because the holiday rush has already begun and my schedule is getting tight, this is a great quick recipe because I use one big cheat to cut down on prep time: ready-to-serve microwavable rice.

Arroz poblano con queso

This arroz poblano recipe also has a unique twist from the typical one you might be familiar with that has chopped poblano and yellow corn kernels mixed into white rice. In my suegra’s house they always add crema Mexicana, which is something I’ve adapted into my own version of this family favorite. My recipe uses a blended poblano crema to coat the rice and keep it moist and a thin layer of cheese both in the middle and on top….

Read More

Recipe, Staple Recipes, Vegetarian/Vegetariano arroz, Chihuahua cheese, chile poblano, crema Mexicana, Poblano pepper, queso Chihuahua, rice

Vegetarian tacos de hongo, chile poblano y cebolla

13 · Mar 13, 2012 · 2 Comments

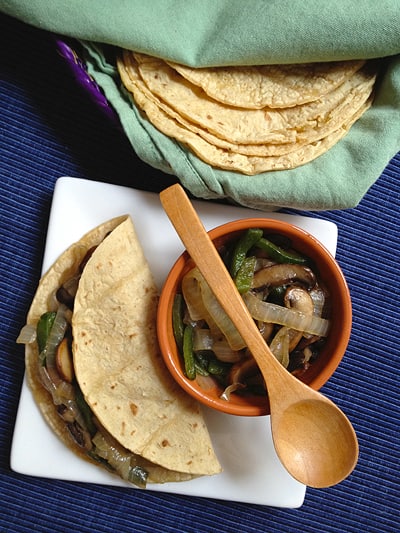
Vegetarian tacos made with sauteed mushrooms, poblano chile and onions. Recipe via theothersideofthetortilla.comI’ve really been wanting to reduce the amount of meat we eat on a daily basis in order to be a bit healthier. I love veggies and don’t mind vegetarian meals, but when you live with a serious carnivore, it’s sometimes really difficult to convince them that a vegetarian meal is a) good and b) filling enough to be a meal and not just an appetizer.  Enter the idea of vegetarian tacos.

Enter the idea of vegetarian tacos.

Sometimes the mere mention of serving a vegetarian meal summons an apocalyptic response in my household. If you can’t get your family to eat a full vegetarian meal, this dish makes a great appetizer to ease them into enjoying it; just double or triple the recipe depending on how many people you’re feeding. They may soon see that an all-veggie meal isn’t so bad after all.

And if you’re truly desperate to get them to eat veggies, you can always add a little crumbled chorizo to this dish. It’s not meatless, but hey, at least they’re eating veggies, right? (You could also attempt to substitute soyrizo for chorizo if you’re brave, but I can’t be held responsible if they figure you out and throw their chanclas at you.)

Regardless, whether you’re vegetarian, trying to get your family to eat less meat or just trying to observe meatless meals during Lent, this is a quick and easy recipe you’re bound to enjoy.

I like to use baby portabellas for this recipe, but you can use  just about any kind of regular medium-sized mushroom you like so long as you slice them somewhat thickly so that when they saute with the onions and butter, they don’t shrink too much, or get too thin when they’re fully cooked.

RELATED: How to roast poblano chiles

…

Read More

Comer Sano/Eat Healthy, Recipe, Snacks, Vegetarian/Vegetariano cebolla, champiñones, chile poblano, Cuaresma, hongos, Lent, mushrooms, onion, quesadilla, receta vegetariana, vegetables, vegetarian

Rajas con crema

224 · Feb 8, 2010 · 20 Comments

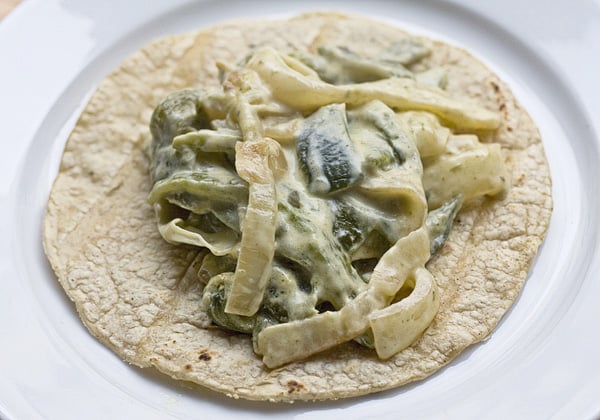
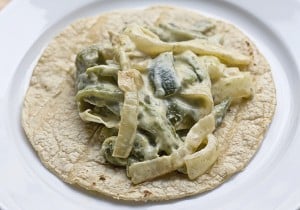
Rajas con crema, a hearty dish made with poblano chiles, onion, crema mexicana and a little bit of cheese, is a favorite in my house. As one friend put it, “anything that comes out of your kitchen at least once a week has got to be good.”

Rajas are particularly popular in central and Southern Mexico, and are so versatile I’ve seen them served as breakfast, lunch and dinner. I can’t speak for all of Mexico, but at least in Mexico City when someone is talking about rajas, they are usually talking about strips of poblanos or this dish specifically.

rajas con crema

According to my husband, José, rajas con crema are the best when the poblanos have a spicy bite, but they’re not too hot. Usually you can tell how hot the poblanos are when you’re removing the seeds after roasting because the heat will burn your skin and if you breathe in too deeply, you might cough. In that case, you may want to soak them in a solution of vinegar and water so they’re not too spicy. If those two things don’t happen, sometimes I skip the vinegar and water soak after roasting the chiles. However, f you soak them too long, the chiles are a little sweet rather than spicy but still delicious nonetheless.

If you’ve never prepared rajas before, you’ll want to first read my tutorial on how to roast poblano chiles before you skip to the directions below.

Some rajas con crema recipes call only for cream, and lots of it; others call for so much cheese that it’s more of a queso fundido in disguise. Mexican sour cream isn’t actually sour like American sour cream; it has a less acidic taste and a thinner consistency. The cheese should melt slowly and not be gooey, and it should be barely visible once incorporated. It’s really more of a bonding agent so the cream doesn’t get soupy.

RELATED: Vegetarian queso fundido with rajas

My version, based on a recipe José grew up eating, strikes a perfect balance. Some people like to eat rajas con crema over rice, or as a side dish with meat like carne tampiqueña (a grilled filet or skirt steak) or cecina (a thinly-cut aged salted beef). In our house, as you may already be fully aware if you’re a regular reader, the taco is king. However you decide to serve it, though, I guarantee it won’t be long before you’re making it again.

chiles poblanos asados

We like to serve rajas in corn tortillas as tacos. Sometimes I make cecina to accompany the rajas but they can stand up as a vegetarian meal on their own or as a hearty side with rice, beans, meat or whatever else you’d like.

RELATED: How to roast poblano chiles

Print

Rajas con crema

Author Maura Wall Hernandez

Yield 12 servings

Rajas con crema is a hearty dish made with poblano chiles, onion, Mexican sour cream and a little bit of cheese. It's used as a taco filling or served as a side dish.

Ingredients

  • 5-6 poblano chiles, roasted, skinned and cut into strips
  • 1/2 of a large white onion, sliced into rings and then cut in half (to make half moon strips)
  • 2 tablespoons salted butter (do not substitute margarine)
  • 5 ounces crema Mexicana
  • 1/2 of coarsely shredded Chihuahua cheese
  • A pinch of kosher salt, or more to taste

Instructions

  1. Roast poblano chiles. Allow them to sweat for 15 minutes, then peel off the skins, remove seeds and cut into strips. 
  2. Using a deep skillet, melt the butter and cook the onions in the butter on medium-low heat until they start to change color and caramelize a bit (slightly transparent and a little brown). Turn off burner and remove pan from heat.
  3. Add the chile strips (rajas) in the pan with the onion, stir to coat well with the remaining butter, and warm over medium heat until the rajas are warm and a little wilted.
  4. Add about 5 ounces of crema and stir in well. Cook for about 2-3 minutes and then reduce heat to low and add a half cup of coarsely grated Chihuahua cheese (if you can't find cheese labeled Chihuahua, any cheese labeled "queso para fundir" will do). The cheese should melt slowly and not be gooey, and it should be barely visible once incorporated. It’s really more of a bonding agent so the cream doesn’t get soupy. Once the cheese is melted, turn your burner as low as it will go, just so it is on to keep the rajas warm.

Notes

Leftovers can be stored in an airtight container in the refrigerator for up to 5 days, and reheated on the stove over medium heat or in the microwave at 30-second intervals.


Plato fuerte/Main dish, Recipe, side dishes, Vegetarian/Vegetariano butter, cebolla, cheese, chile poblano, crema Mexicana, mantequilla, onion, Poblano pepper, queso Chihuahua

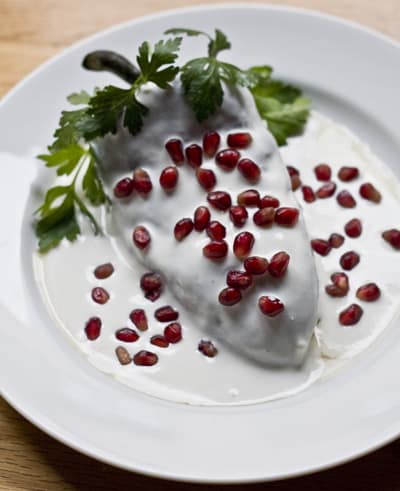
CHILES EN NOGADA

2 · Sep 28, 2009 · 10 Comments

ChileEnNogada
chile en nogada

Cinco de Mayo is not Mexican Independence Day—a statement that usually surprises my non-Mexican friends. Every September, I practically go on a two-week blitz campaign to educate my friends about the real Mexican Independence Day.

The celebration technically begins on September 15th, La Noche del Grito. People all over Mexico gather in their town squares and many watch on television as the clock strikes eleven and the president shouts “Viva Mexico,” and the crowd echoes back the same. “Viva la independencia!”

It’s a grand display of national pride; much like the Fourth of July with the fireworks, parades and parties. I always love watching it on TV, seeing the zócalo in Mexico City filled to the brim with people.

This year, I was standing in my living room with a hand full of queso fresco as I watched El Grito. I was in the middle of making a special sauce, and just as the clock struck eleven, I was about to put the cheese into the blender with milk and walnuts. I didn’t want to miss the big moment, so there I was, cheese in hand, watching my TV and trying not to drip on the floor.

If you’ve never seen El Grito before, here’s your chance:

For 2009, I decided to make my own chiles en nogada, a very typical (and somewhat labor intensive) dish served around this time of year that showcases the colors of the Mexican flag. When I told my suegra my plans weeks before, she asked if I’d be able to find all the ingredients. I had to go to a few stores in order to get everything, and actually, the only ingredient that was difficult to find was a decent-looking pomegranate.

This recipe is from a traditional Spanish-language cookbook by Susanna Palazuelos I received as a gift from my suegra a few years ago, and is adapted to our liking. The original recipe calls for some ingredients I don’t care for so I adjusted portions and some substitutions, but the core of the recipe is still the same. The results were excellent and I even shared some with a few Mexican friends here in Chicago who had never before tasted this very traditional dish.

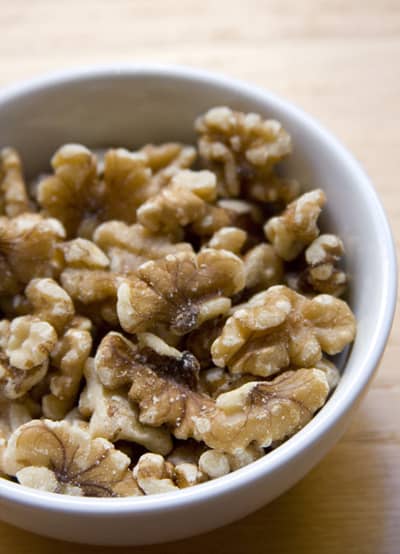
Walnuts WEB
nueces

RECETA:

  • 10 chiles poblanos
  • 2 tbsp salt
  • 1 tbsp white vinegar
  • 1 pomegranate, seeds reserved
  • A few sprigs of parsley to decorate each chile

NOGADA

  • 1 ½ cup walnut halves
  • 1 ¼ cup milk (2% or whole; you will use 1 cup of the milk to soak the walnuts)
  • 1 ½ cup Mexican cream (crema de leche espesa)
  • 10-12 ounces of queso fresco
  • 2-3 tbsp cane sugar
  • a big pinch of salt

PICADILLO

  • 1 lb pork loin, cut into a few sections
  • 6 cups water
  • about 1/3 of a white onion (a big slice)
  • 7 cloves of garlic (3 whole, 2 crushed for the pork broth; 2 crushed for the picadillo)
  • 1 bunch of fresh flat parsley, divided (3/4 will go in the broth, ¼ will go in the picadillo)
  • 1 to 1 ½ tbsp salt
  • ¼ cup of vegetable oil
  • ¾ of a cup of white onion, finely chopped
  • 1 large red tomato, peeled, seeds removed and finely chopped
  • 1-2 apples, peeled and finely chopped (yields about 1 cup)
  • 1 large pear, peeled and finely chopped (yields about ¾ of a cup)
  • 1 large peach, peeled and finely chopped (yields about ½ a cup)
  • ¾ cup golden raisins
  • ¼ cup almonds, blanched, peeled and finely chopped

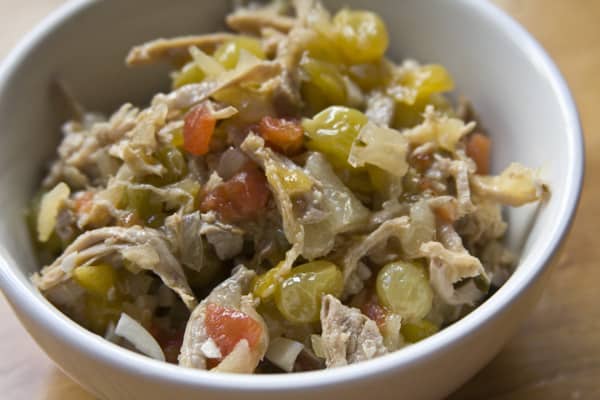
Picadillo WEB
picadillo

THE NIGHT BEFORE: Blanch the walnuts for about 5-7 minutes, let cool slightly and peel the skins off. This is the most important part of the recipe not to cheat on, because the skin is bitter. It will take you awhile to do it, but trust me, you don’t want to leave the skins on. Put the skinned walnuts into a measuring cup and cover with 1 cup of milk, cover with saran wrap and leave in the refrigerator overnight. It took me about 1 hour from start to finish with prepping the walnuts.

Measure out ¾ of a cup of golden raisins and rehydrate them by covering with water (room temperature). Let them rehydrate overnight. Drain the water in the morning and reserve the rehydrated raisins until you are ready to use them.

DAY OF:
Using a slotted spoon, transfer the walnuts out of the milk and into a blender. Pour about ¾ of the milk into the blender. Discard the rest. Add the Mexican cream, fresh milk, sugar and salt to the blender. Crumble the queso fresco over the ingredients in the blender so it is easier to incorporate (you want the sauce to be completely smooth with no lumps). Blend until very smooth. Pour into a container and refrigerate.

To prepare the relleno, fill a pot with 6 cups of water and add the slice of onion, 3 whole cloves of garlic (peeled but not chopped), 2 cloves of peeled and crushed garlic, the little bunch of parsley and ½ tbsp of salt. Bring to a boil and add the pork loin piece by piece. Allow it to boil gently for about 15 minutes and then let it simmer for about 40  minutes or until the pork is fork-tender. Remove the meat from the broth and let cool a bit. Shred by hand or with a fork and set aside. Reserve about 1 cup of broth. (Use the rest for another recipe like soup if you wish—you just  made pork stock.)

I suggest you chop everything for the picadillo first.

Start with the garlic: crush 2 cloves and add to a large pan. Chop ¾ of a cup of white onion and add to pan. Peel and remove the seeds from the tomato and then finely chop. Set aside in a prep dish. Chop the ¼ of a bunch of parsley left and add  to prep dish with tomatoes.

Peel and finely chop the apple, pear, peach and blanched almonds. Set aside in another prep dish.

Heat your pan on the stove with the ¼ cup of oil. Add the garlic and onion and cook for about 4-5 minutes on medium heat or until the onion is transparent, but be careful not to burn it. Add the chopped tomatoes and parsley (distribute evenly in pan) and let cook for about 5 minutes without stirring it. (That’s why you need to distribute it evenly in the pan.)

Stir the oil, garlic, tomatoes and parsley briefly. Incorporate the rest of the salt (1/2 to 1 tbsp), the apple, pear, peach, raisins and almonds and cook over medium heat for about 5 minutes. Add the shredded pork loin and the reserved broth. Continue cooking at medium heat for 7-10 minutes or until the fruit has cooked and the mixture looks thickened. Let the picadillo come to room temperature and reserve.

RoastedPoblano WEBRoast the chiles over an open flame and peel them. Make a large cut down the side of each chile, making sure to not break them or rip the skin. (I suggest using latex gloves for the next step.) Using your fingers, carefully remove the seeds from inside the chile and then use the knife to remove any large veins. If you need a full tutorial with step by step instructions on how to roast them, you can reference my post on how to roast poblano chiles.

In a large bowl, dilute 2 tbsp of sea salt and 1 tbsp of white vinegar with water to completely cover the chiles. Let them soak for 40-60 minutes. This will take a little bit of the heat out of them if they are too spicy. After soaking, rinse the chiles with cool water and pat them dry as much as possible with paper towels. With a spoon, add a little bit of the relleno to each chile, being careful not to overfill them.

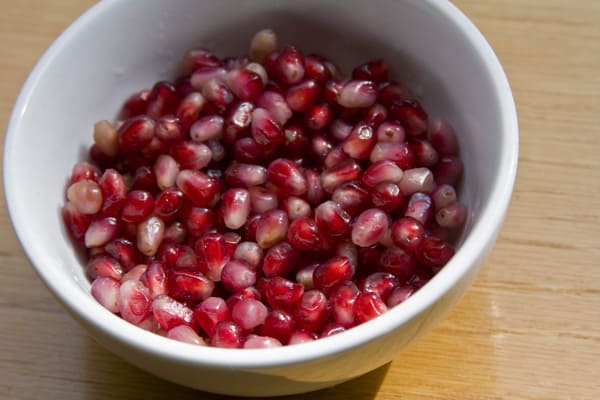
While the chiles are soaking in the salt, water and vinegar solution, cut the ripe pomegranate and reserve the seeds in a prep dish. To remove the seeds without making a mess, slice the pomegranate with five cuts but don’t slice all the way through. Submerge in a bowl of cool water, pull apart the slices and remove the seeds gently by hand. Rinse gently.

Pour the nogada over the chile filled with picadillo and sprinkle the pomegranate seeds on top. Garnish each chile with parsley and serve at room temperature.

semillas de granada
semillas de granada

Chiles, Cultura/Culture, Holiday dish, Holidays, Mexico City, Plato fuerte/Main dish chile poblano, día de la independencia, El Grito, Mexican Independence Day, nogada, nueces, picadillo, pomegranate, Susanna Palazuelos, walnuts

HOW TO ROAST POBLANO CHILES

75 · Sep 20, 2009 · 9 Comments

Step-by-step instructions on how to roast poblano peppers using a gas stove, comal or  barbecue grill from theothersideofthetortilla.com
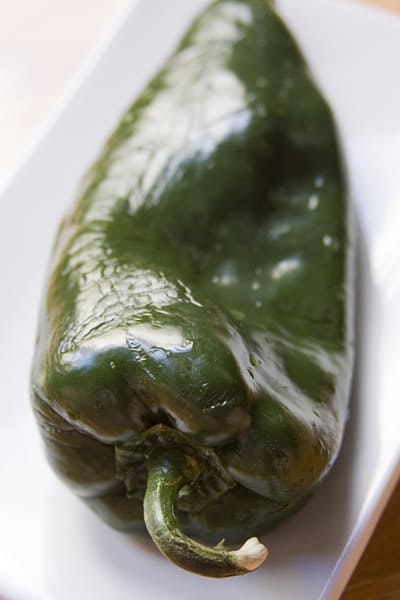
a fresh poblano chile before roasting

Over the years, I’ve been asked many times how to roast poblano peppers. It’s easier than you think, but takes a little bit of time because you have to roast, sweat, peel, seed and devein them to prepare them for use in a dish. Poblano chiles are used for a number of Mexican dishes such as chiles rellenos, chiles en nogada and rajas con crema, to name a few. I can’t think of many dishes I make without roasting the poblano chiles first, which gives them a more robust flavor. Poblano peppers are also called chile poblano, poblano chiles or, in some cases depending on the region, pasilla chiles. (These are not to be confused with the dried pasilla chile.)

I sometimes make the mistake of using my bare hands to peel, devein and remove the seeds of a poblano chile because it doesn’t smell too spicy. Usually each time I do, I get fooled and the back of my hands feel like they’re burning for the rest of the day. A few times, I’ve scratched my forehead only to feel the searing sensation and have a little red raspberry spot to show off my mistake.

You can save yourself from the burn by wearing fitted latex gloves.

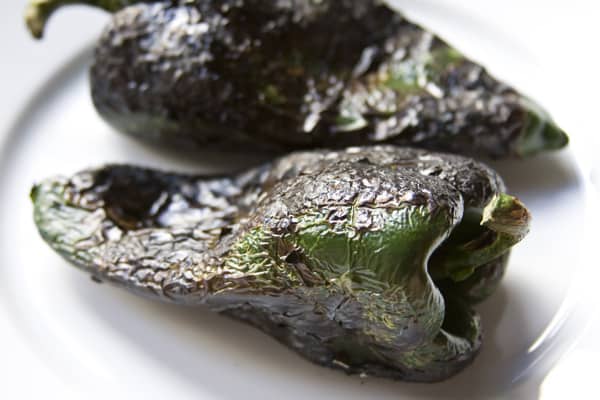
There are several methods for roasting chiles. The two ways I prefer are over a direct flame or on a hot comal. Either way, be sure not to burn the meaty flesh of the chile or it will have a bitter taste. With both methods as the skin starts to blister, you’ll hear what sounds like little zaps of electricity or sizzling—that’s normal.

ROASTING POBLANO PEPPERS OVER A FLAME

  • Place 1-2 chiles directly on the stove burners over a medium flame. Turn with kitchen tongs as each side blisters until the skin is toasted and blackened, but it should not blacken so much that it starts to peel or turn into ash. It should take a few  minutes per side and about 10-12 minutes total, depending on how large they are.
  • You can also follow this same method  on a barbecue grill to roast more peppers at once.

ROASTING POBLANO PEPPERS ON A COMAL

  • If you don’t have a comal (a flat, thin, and usually round or oval shaped pan for cooking tortillas), use a cast-iron or heavy non-stick skillet. Heat over medium flame and add 2-3 chiles to the comal. Turn them until the surfaces are toasted and blackened. The amount of time it takes will depend on whether you have a gas or electric stove and the thickness of your comal or skillet.

Step-by-step instructions on how to roast poblano peppers using a gas stove, comal or barbecue grill from theothersideofthetortilla.com
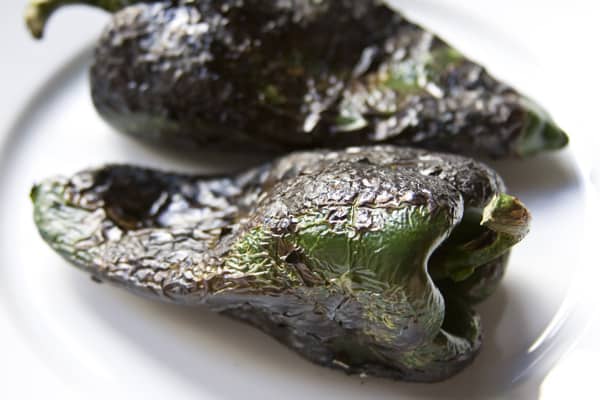
Roasted poblano pepper

HOW TO SWEAT THE CHILES

Place the chiles in a sealed, plastic Ziploc bag to “sweat” for about 15 minutes. (You can also refrigerate the chiles for a day or two after sweating if you are not ready to peel, devein and remove the seeds for use.) Sweating has two purposes: first to remove the skin and then to cook the chile a bit further in its own vapors to acquire the characteristic taste of a freshly roasted chile. Have a bowl or plate ready to hold the skinned chiles.

Put on your latex gloves.

After 15 minutes, open the bag and one at a time, pinch part of the skin so it tears and peel it off. Remove the skins from each chile and transfer them to the bowl or plate you have waiting. Discard the skins.

HOW TO SEED AND DEVEIN POBLANO PEPPERS

To devein and remove the seeds, cut a slit along the side of the chile. Use your fingers to dislodge the seeds. Pull out what you can with your fingers and then using a slow but steady stream of cool water, rinse the inside of the chile. This should flood the rest of the seeds out if you knocked them loose but couldn’t remove them with your fingers.

Feel for any thick veins along the side of the chile. Using a small paring knife (and being careful not to pierce the skin) gently cut the veins away from the skin. Pat the chiles dry with a paper towel to remove any extra moisture inside and out.

Now the chiles are ready to prepare for a dish.

Chiles, How To chile poblano, roasting chiles

Primary Sidebar

¡Bienvenidos!

Hi, I'm Maura Hernández. Welcome to my kitchen! I'm an award-winning food and travel blogger, recipe developer, and former journalist sharing my passion for all things Mexico. Married to a Chilango, I've traveled Mexico extensively over the last 15 years. Here, you'll find a mix of traditional and modern Mexican cooking, along with my advice on where to eat, stay and play on your visit to Mexico! READ MORE

New recipes, fresh travel tips + more

Delivered straight to your inbox!

Copyright © 2023 The Other Side of the Tortilla on the Cravings Pro Theme