Pan de muerto is a yeasted sweet bread perfumed with orange blossom water or orange zest and dusted with a sugar topping. This pan dulce is typically eaten to celebrate Day of the Dead and is also given as an offering on altars for Día de los Muertos.
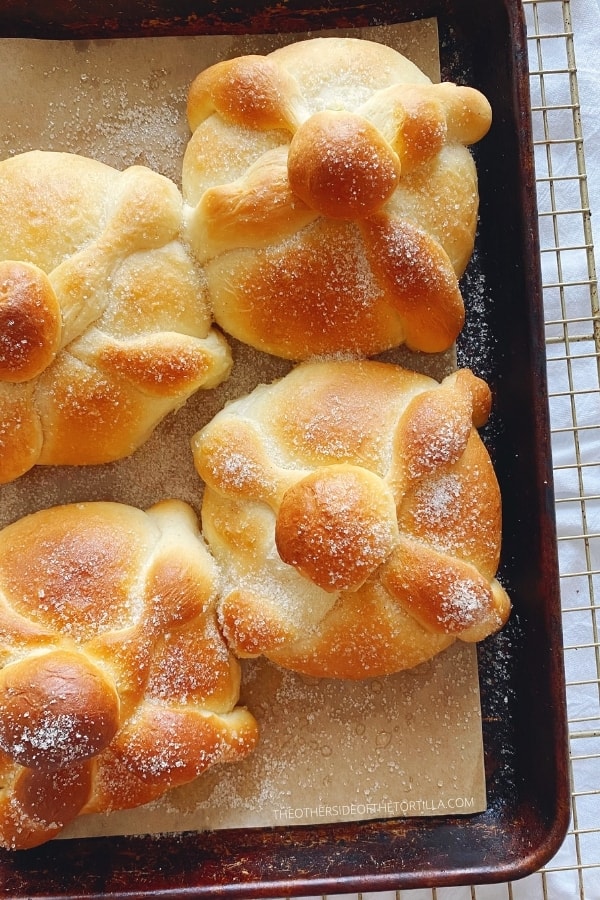
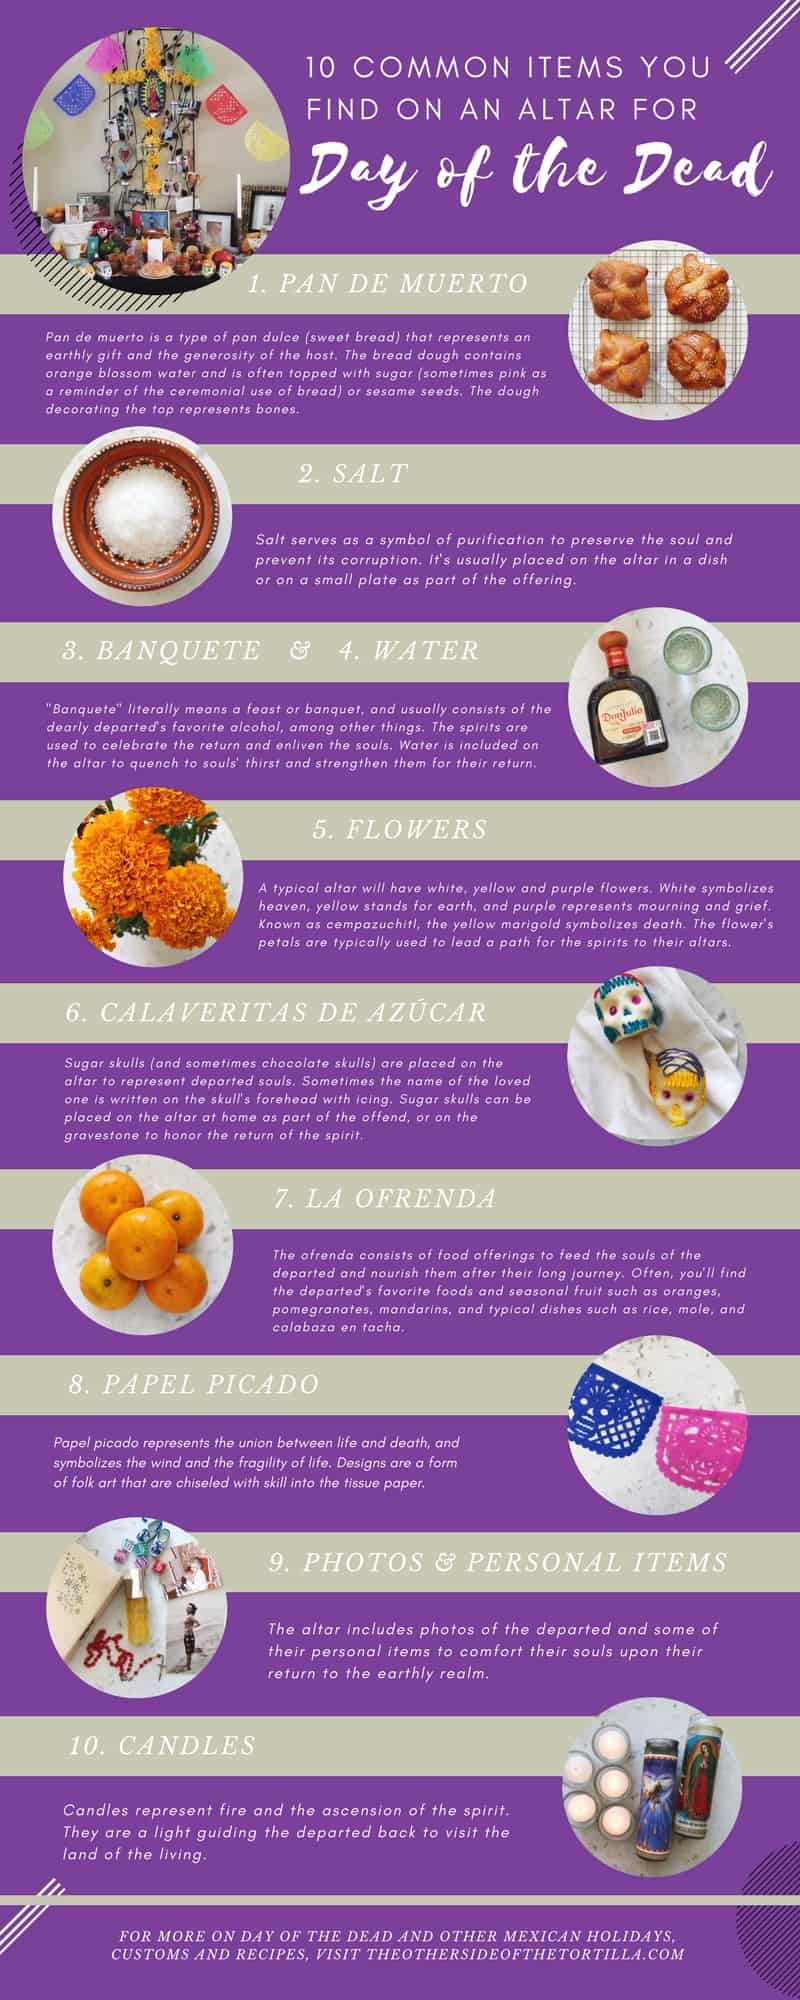
In fact, the most common offering on an altar for Día de los Muertos, aka Day of the Dead, is pan de muerto (literally: “bread of the dead”). Alongside other items included in the ofrenda, the bread is intended to honor the souls of our loved ones who return to visit us and give them nourishment. Other items on the altar may include food and drinks loved by the deceased, trinkets and other symbolic offerings such as marigold flowers (known in Spanish as cempazuchitl), sugar skulls, papel picado, candles and more. You can read more about the symbolic elements of the altar in my post about How to Celebrate Day of The Dead. This holiday is celebrated on November 2, known to Catholics as All Souls’ Day.
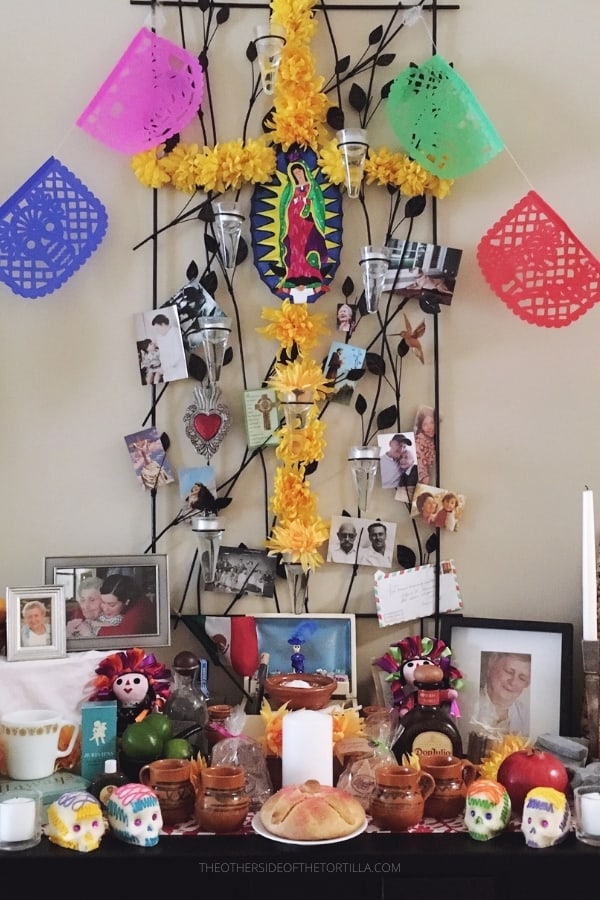
Pan de muerto represents an earthly gift and the generosity of the host. The bread dough contains orange blossom water and is often topped with sugar or sesame seeds, depending on the region of Mexico. The dough decorating the top represents bones.
Depending on the region of Mexico you visit this time of year, you may notice that there are other forms this bread can take such as little people, dolls or half-moons. The traditional shape is round with the dough arranged on the top to represent bones. The dough ingredients may also vary slightly according to region, sometimes containing anise seeds or orange zest. In Mexico City, the sugar topping is the most popular. Some areas of Mexico use pink or red sugar, but the most common is plain, uncolored sugar.
In the past, it was common for pan de muerto to be sold in panaderías only a few days prior to Día de los Muertos, but with the growing interest in the holiday outside of Mexico and modern supply and demand marketing, you’re likely to see pan de muerto in grocery stores and some bakeries in Mexico City as early as late August and early September. Even for those who don’t actually celebrate the holiday, it’s common to buy pan de muerto to consume this time of year.
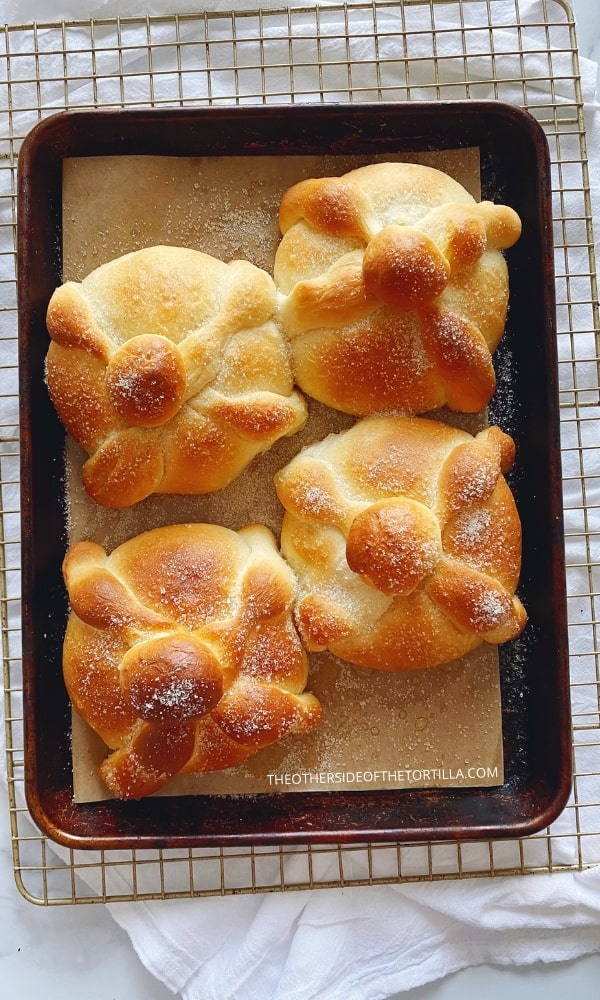
The pan de muerto form you see pictured here is the most common you’ll find in Mexico City; the round base represents a grave mound covering the coffin, the dough shaped like bones represents the arms and legs, and the ball of dough on top represents the skull. The bread itself is made from the same masa bizcocho dough that is used to make conchas, roles de canela, pan de anís, novias, chilindrinas, rebanadas and other similar types of Mexican pan dulce.
You might also like: A-Z Guide to Mexican Pan Dulce
In Oaxaca, the base of pan de muerto is made with their traditional pan de yema, and is sometimes adorned with sesame seeds. In other areas of Mexico, this bread carries other names and has more elaborate decoration as well.
This recipe can make 6 small individual rolls, 4 medium individual rolls, or 2 large pan de muerto breads for sharing with up to 4 people. If you want to make this recipe as one large bread, you may need to adjust the baking time by adding a few minutes.
Ingredients you’ll need
The only specialty ingredient that you’re unlikely to have on hand in your pantry is orange blossom water. I recommend trying international grocery stores for this ingredient or checking the international aisle where there may be Middle Eastern ingredients, as orange blossom water is a common ingredient in Middle Eastern cooking. If you can’t find it there, you can easily order online. Nielsen-Massey also makes one that is often sold in the baking aisle, but I don’t love their version because it contains too much of an alcohol scent for my liking.
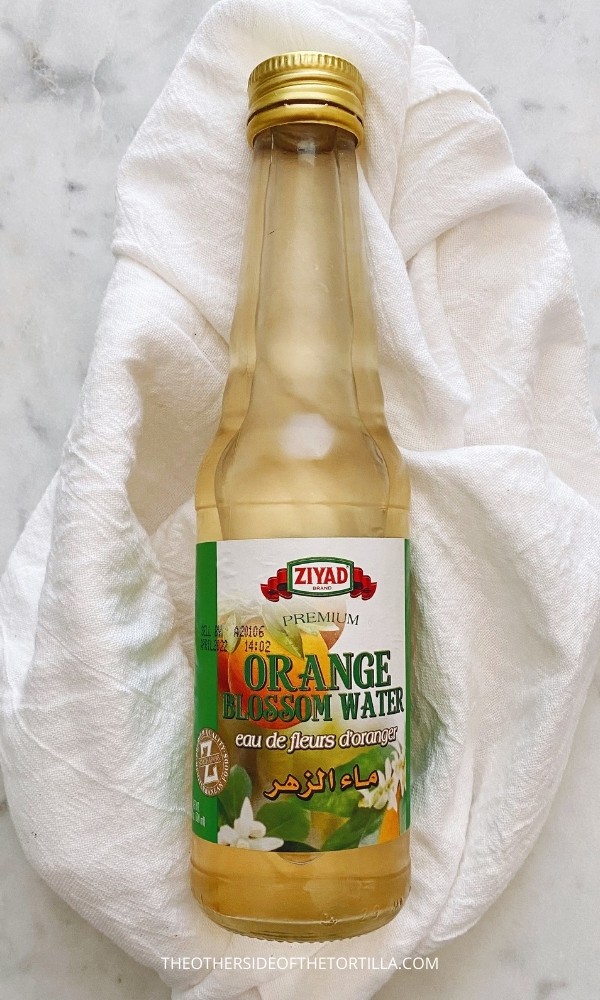
You can substitute finely grated orange zest for the orange blossom water if you prefer, or if you can’t find the water in the store/online. Your pan de muerto will taste similar but won’t have the same floral aroma as the orange blossom water.
Ingredients include:
- Bread flour
- Granulated sugar
- Fast-rise instant yeast
- Whole milk, warmed (but not hot) to help the yeast develop
- A large egg at room temperature
- Unsalted butter at room temperature
- Pure vanilla extract
- Kosher salt
- Orange blossom water or orange zest
Kitchen tools you’ll need
I’ve linked the exact products below that I use in my kitchen to produce perfect pan dulce every time.
- A kitchen scale will ensure your ingredient measurements are precise. Baking is chemistry and the correct amount of ingredients are required in order to get the results pictured!
- A bench scraper will help you make more precise cuts in the dough. If you don’t have one, you can also use a very sharp knife. Some at-home bakers also swear by plain, unflavored dental floss to make precise cuts by placing the floss underneath the dough and then criss-crossing the threads to make a cut.
- Use parchment paper or a Silpat to line your baking sheet to protect the bottom of the pan dulce from burning.
- A 6-quart clear food container with lid for proofing the dough or a very large glass bowl and plastic wrap – this yeasted dough will double in size during the first rise. You’ll grease the container with cooking spray before you put the dough in to rise to prevent it from sticking to the surfaces, then seal tightly with the lid. If you don’t have a container with a lid, a glass bowl and some plastic cling wrap can also do the job.
- A stand mixer makes this recipe much less work. I use a 4.5 quart Kitchen Aid tilt-head classic stand mixer.
How to make the bread
Make your dough in a stand mixer with the dough hook attachment following the directions below in the recipe and then allow it to rise undisturbed until it’s doubled in size, about two hours. This is a high-hydration dough, meaning it will be sticky. You’ll know it’s ready to come out of the mixer when most of the dough pulls away from the sides and sticks to the hook. It’s tempting to add more flour when the dough is sticky, but don’t do that. The dough will get a bit less sticky after the bread flour has had a chance to absorb the liquid and the dough rises.
To form your pan de muerto, turn the dough out onto a floured surface. Use all-purpose flour for this step – just enough to keep it from sticking to the work surface and your hands. Cut the dough into equal size parts with a bench scraper depending on whether you’re making 1, 2, 4 or 6 pieces.
Take each piece of dough and then cut one-third off to make the bones. You’ll cut that one-third into 3 pieces: 2 larger pieces that you’ll roll into a log shape to create the bones, and the ball shape for the top.
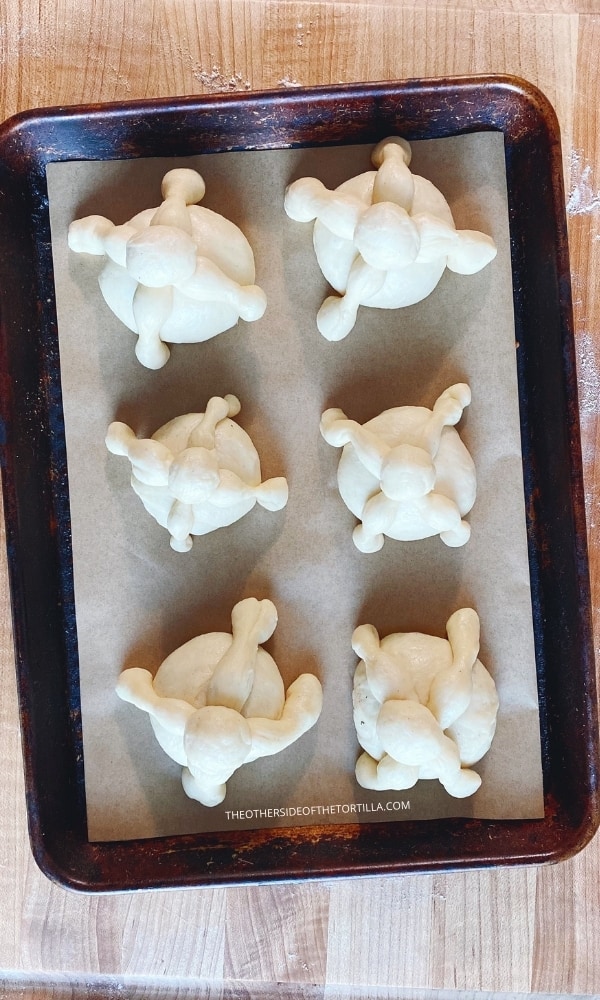
The technique for rolling the longer pieces that symbolize bones is very easy: gently roll the dough into a log shape first. Then, spread your fingers on your dominant hand and roll against your work surface so that the dough underneath each finger becomes slightly skinnier, and the dough between your fingers is a bit more fat, almost like a ball. Drape these pieces over the top of the main dough ball in the shape of a cross. Roll the dough ball for the top and stick it to the middle of where the two other pieces meet. As the bread goes through its second rise, it’s common for the dough ball on top to migrate a little. You’ll be able to push it back into place before it goes into the oven.
Once you have the pan de muerto formed, cover with plastic wrap and a kitchen towel and allow to rise again until about doubled in size. This should take between 1.5-2 hours depending on how warm your kitchen is. A warmer kitchen can mean a faster rise, but don’t make your kitchen warmer just for this purpose. The dough should look like this just before you cover with plastic wrap and a kitchen towel for the second rise:
After the dough has doubled in size, bake the bread in a pre-heated 350 degree F oven for about 12 minutes, until the top and sides of the bread have browned but not burned. If they look to be getting too brown, you can take them out early. Likewise, if they are not brown enough, you can leave them in for a few extra minutes.
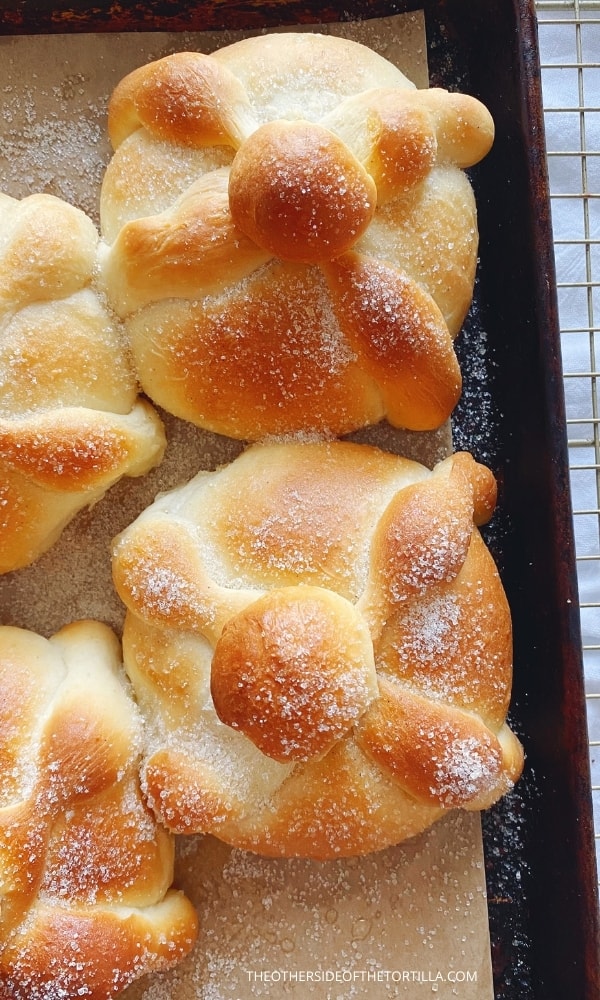
Bread that has just come out of the oven is immediately brushed with melted butter and sugar is liberally sprinkled on top to stick to the butter. It should look like this:
What to serve with pan de muerto
This pan dulce is pretty much always served with a hot beverage. Whether you serve with Mexican hot chocolate, an atole, coffee or café de olla is up to you!
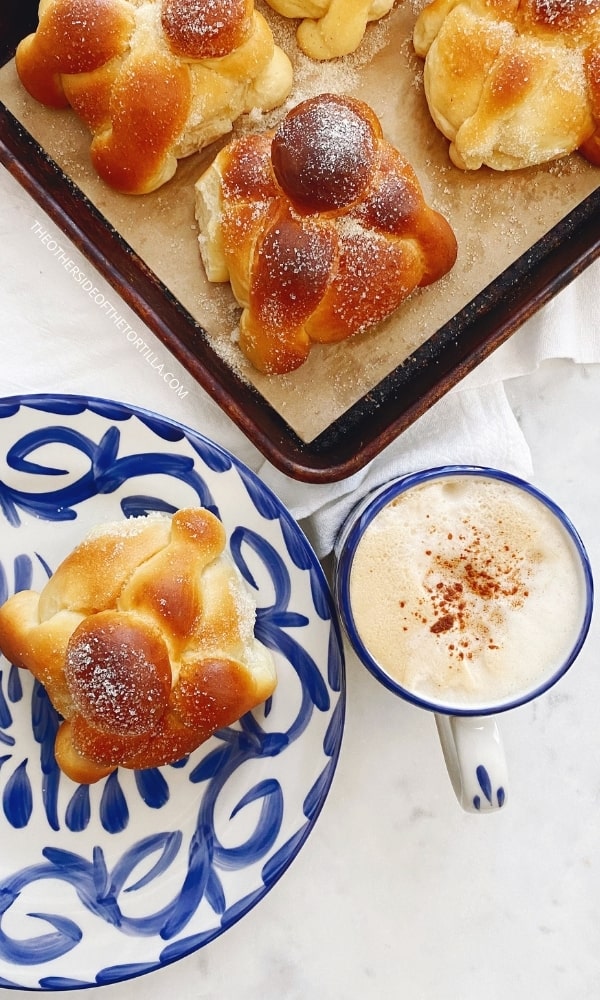
Here are a few hot beverage recipes you might enjoy for dunking your pan de muerto or drinking along with it:
If you love pan dulce, you should also try making my recipes for orejas, garibaldi, hibiscus-glazed doughnuts or Mexican chocolate-glazed doughnuts.
Print
Pan de muerto
- Prep Time: 20 minutes + 4 hours inactive prep time to rise
- Cook Time: 12 minutes
- Total Time: 4 hours, 32 mins
- Yield: 6 individual servings 1x
- Category: Pan dulce
- Method: Baking
- Cuisine: Mexican
Description
Pan de muerto is a traditional yeasted pan dulce perfumed with orange blossom water or orange zest and dusted with a sugar topping. This sweet bread is typically eaten to celebrate Day of the Dead and is also given as an offering on altars for Día de los Muertos.
Ingredients
- 225 grams bread flour
- 36 grams granulated sugar (I use Zulka brand)
- 6 grams fast-rise instant years
- 40 grams unsalted butter, room temperature
- 125 grams whole milk, warmed
- 1 large egg, room temperature
- 1 tablespoon orange blossom water
- 1/2 teaspoon pure vanilla extract
- 3 grams kosher salt
For topping:
- 1 tablespoon unsalted butter, melted
- 1/4 cup granulated sugar for dusting
For greasing the container where you’ll proof the dough:
- Cooking spray such as PAM Original
For flouring your work surface:
- All-purpose flour, as needed
Instructions
- Add 225 grams bread flour, 36 grams sugar, and 6 grams of fast-rise instant yeast in the bowl of a stand mixer. Using the dough hook attachment, turn mixer to speed 2 to combine dry ingredients.
- Add 125 grams warm milk, 1 tablespoon orange blossom water, 1 large egg, and 40 grams of butter to the bowl and increase speed to 4 for 5 minutes.
- Add 1/2 teaspoon pure vanilla extract and 3 grams kosher salt to the bowl and continue to mix on speed 4 for about another 10 minutes, until dough pulls away from the sides of the bowl and mostly gathers around the hook. You may need to stop the mixer partway through to scrape down the sides with a spatula so no dough is wasted.
- Prepare a large glass bowl or a 6-quart food container with lid for proofing the dough by spraying the inside with cooking spray so the dough won’t stick to the sides.
- Turn the dough out from the stand mixer bowl into the bowl or container to proof. If using a glass bowl, cover with plastic cling wrap and a kitchen towel. If using a food prep container, seal with the lid. Allow dough to rise undisturbed for about 2 hours, or until doubled in size.
- Once dough has doubled in size, turn out onto a floured surface (use all-purpose flour for this part, just enough so the dough doesn’t stick to your work surface). Using a bench scraper or very sharp knife, divide the dough into the number of serving sizes you want, making the sizes as close to equal as possible.
- Cut 1/3 of each piece of dough off and then cut again to make the 2 “bones” across the top of the bread, and the dough ball for the top.
- Use your hands to roll the main piece of dough into a ball. If you have any seams, they should be on the bottom. For the bones, roll two skinny ropes by rolling it with your fingers to make indentations. Roll the ball for the top, again making sure any seam is on the bottom so it won’t be seen. Place the bones in a cross-shape over the top of the main piece of dough, then top with the ball.
- Cover with plastic wrap and a lightweight kitchen towel and allow to rise again until nearly doubled in size (about 1.5-2 hours).
- Bake in a pre-heated 350 degree F oven for about 12 minutes, until the tops and sides are sufficiently browned but not burned.
- Once you remove the baked bread from the oven, brush each bread with melted butter and liberally sprinkle sugar on top. Serve immediately or allow to cool before storing.
Notes
This recipe can make 6 small individual rolls, 4 medium individual rolls, 2 large or 1 extra large pan de muerto breads for sharing with up to 4-6 people.
TO MAKE THE DOUGH AHEAD OF TIME: If you’d like to make the dough the night before, you can allow it to rise overnight in the refrigerator so long as you keep the bowl or container covered so the dough does not lose moisture. The cold temperature of the refrigerator will slow the growth and rise of the bread, but overnight will be plenty of time for the dough to double in size. It’s OK if it rises a bit more.
STORAGE: This bread should be eaten within 2-3 days of baking. It will dry out over time. Ideally, if you can store it under glass in a cake dome, it should retain moisture fairly well. If you store it in a plastic bag, the sugar topping will sweat a bit and dissolve, but you can just dust with some additional sugar before serving if you want it to look pretty.
Keywords: pan de muerto, pan dulce, day of the dead, día de los muertos
If you want to try a modern riff on pan de muerto that’s similar to the French brie en croute, but using Mexican ingredients, you’ll love this panela en croute recipe that has puff pastry stuffed with panela cheese and ate de guayaba or membrillo (guava paste or quince paste).
Made these first thing this a.m. and I finally found a use for that orange water. Delicious. Thank you for sharing the recipe. Wish I could leave a photo – they are perfect.
★★★★★
This is my second year using this recipe to make pan de muerto. Both times, it’s turned out SO unbelievably soft. The note about not adding flour even when you want to is correct. Thanks for the great recipe!
★★★★★
Baked them and they came out super fluffy and delicious. They were a little bland, maybe ill add a little but more sugar next time
★★★★