


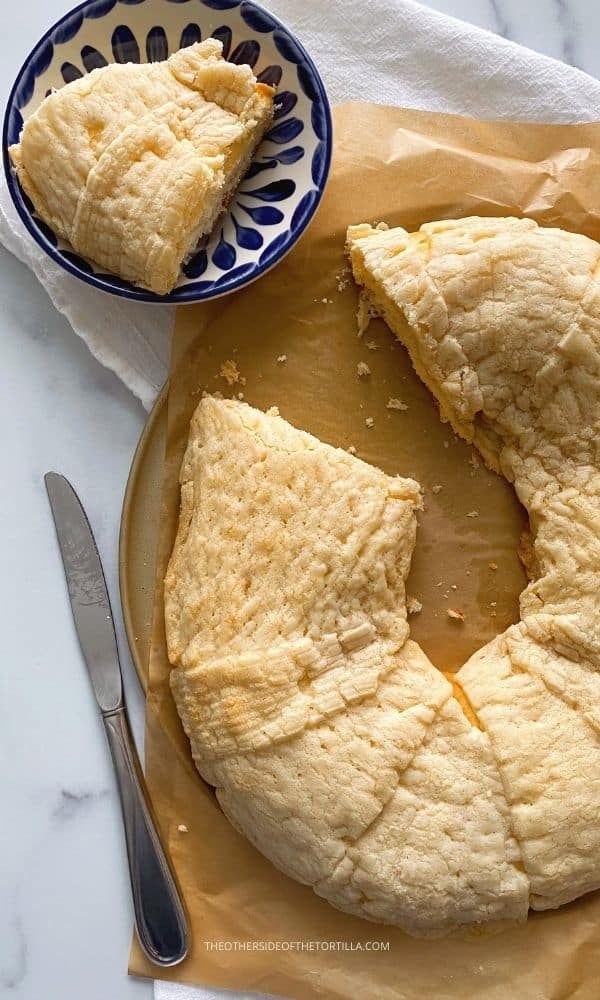
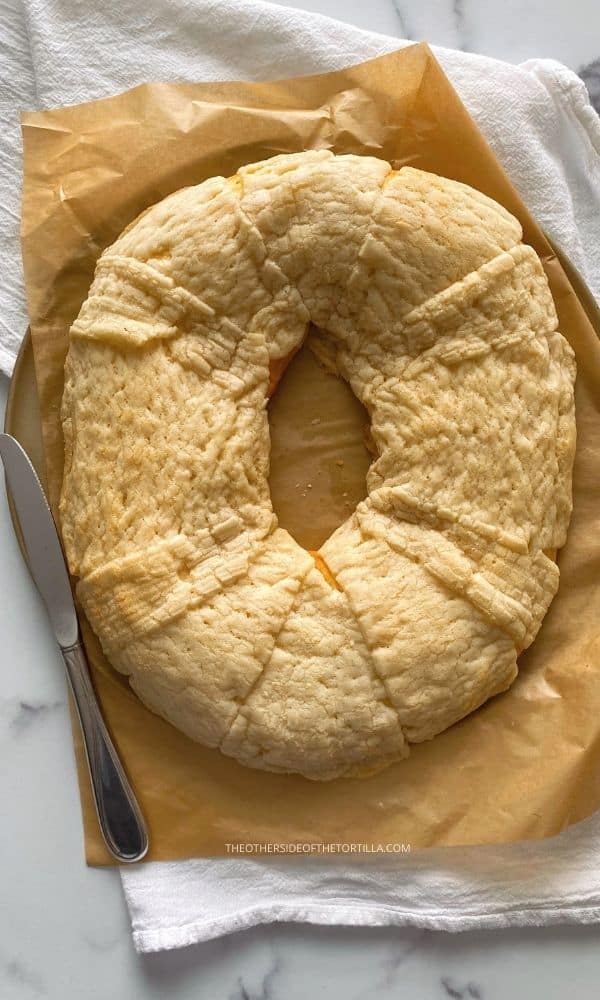
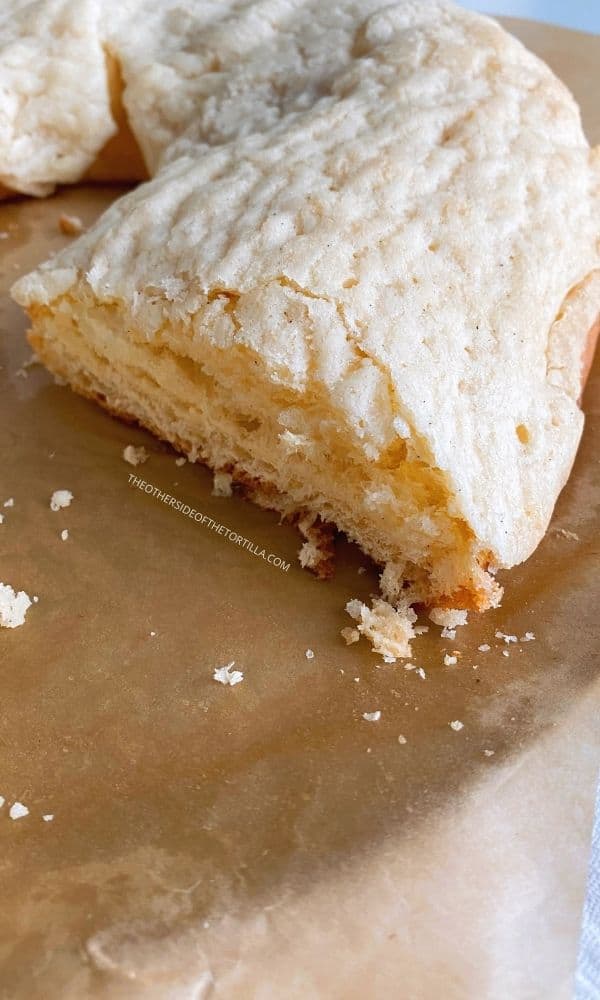
This modern version of Rosca de Reyes has only one topping: everyone's favorite crunchy sugar crust!
If your family is anything like mine, certain family members clamor for the piece of rosca with the sugar crunch topping every Día de Reyes. There's never enough pieces for all the people who want that addictive crunch, and somebody is inevitably disappointed they had to eat a piece without it.
So instead of fighting over a few limited pieces, I decided a few years ago to begin making a version that is completely covered in the crunchy sugar topping and it has become my husband's favorite version of Rosca de Reyes we make at home to celebrate Día de los Reyes Magos. In English, this holiday is known as Epiphany, the celebration of the arrival of the Three Wise Men in Bethlehem to visit the newborn baby Jesus. It is celebrated on January 6 every year.
If your family likes a regular rosca and you have no issues with anyone fighting over the sugar crust pieces, you'll surely love my traditional Mexican Rosca de Reyes recipe that includes the typical dried and candied fruit and nut toppings.
But if you're always trying to cut the piece with sugar crust, then this rosca is just for you!
What is a rosca de reyes?
This sweet yeasted bread shaped in an oval or circle has been part of Dia de Reyes for more than 400 years. This treat arrived in Mexico from Spain during the conquest in the 16th Century, and was incorporated as part of religious traditions in the new world. Rosca de reyes is considered a type of pan dulce. It has religious symbolism, but has also transcended religion to be a part of popular culture in Mexico during the holidays and is eaten by many, regardless of their religion.
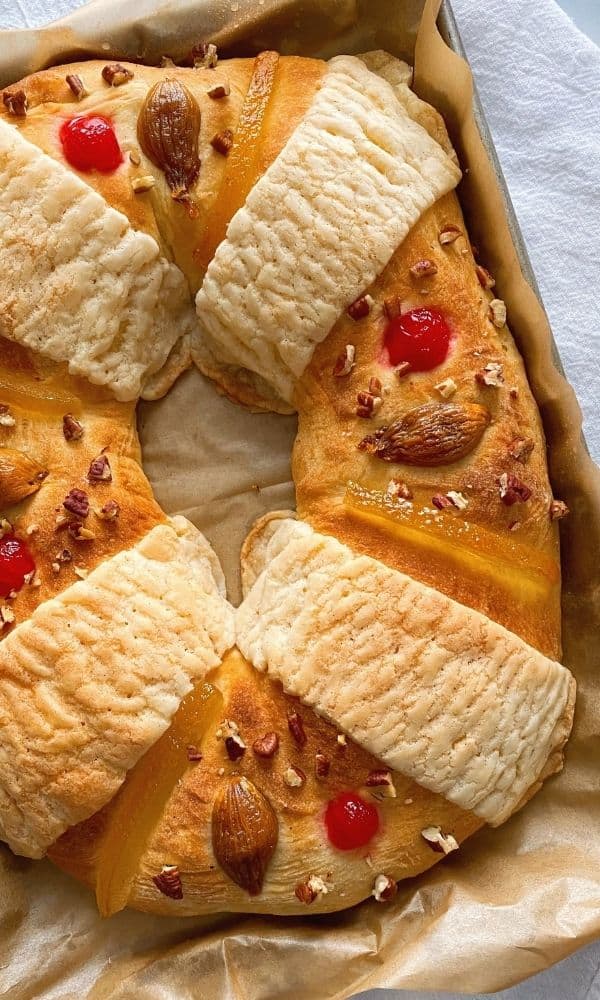
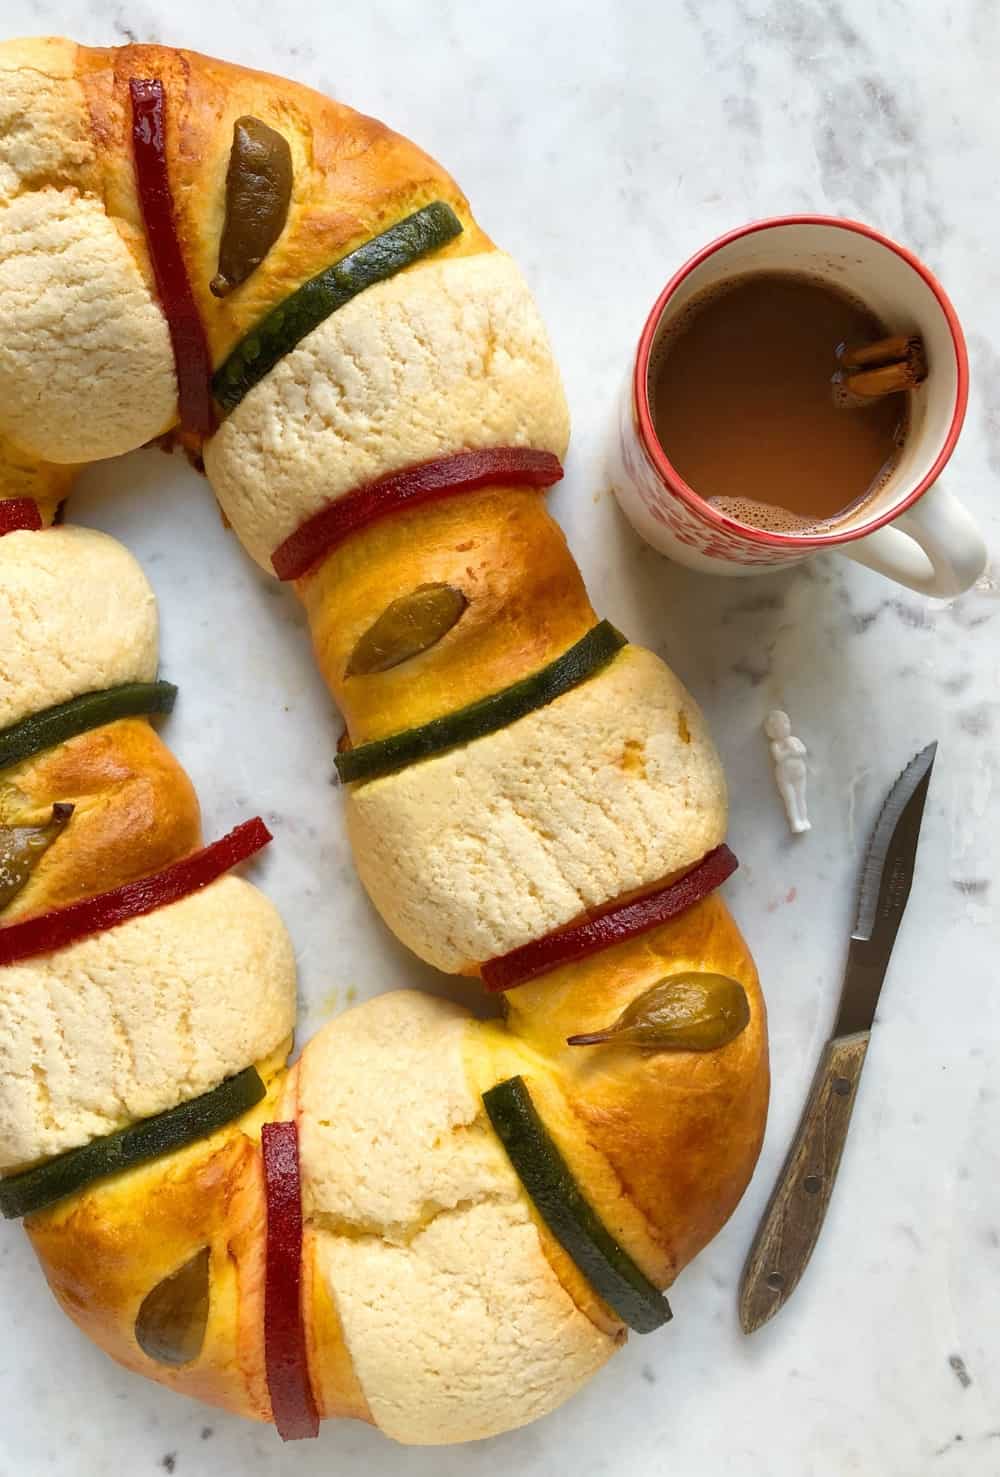
They can come in various round and oval sizes, some with filling inside such as whipped cream, pastry cream, guava, or cajeta, among others. The fruit topping adornments represent the jewels in the crowns of the Three Wise Men.
A more traditional version with fruit and nut toppings looks like this:
In Spain, rosca de reyes is known as roscón de reyes or roscón for short, and usually round rather than oval-shaped. Traditional toppings in Spain also include candied fruit, and some have a whipped cream or other sweet filling.
The rosca de reyes is not the same as a king's cake to celebrate mardi gras, though it has some similarities and is consumed around the same time of year.
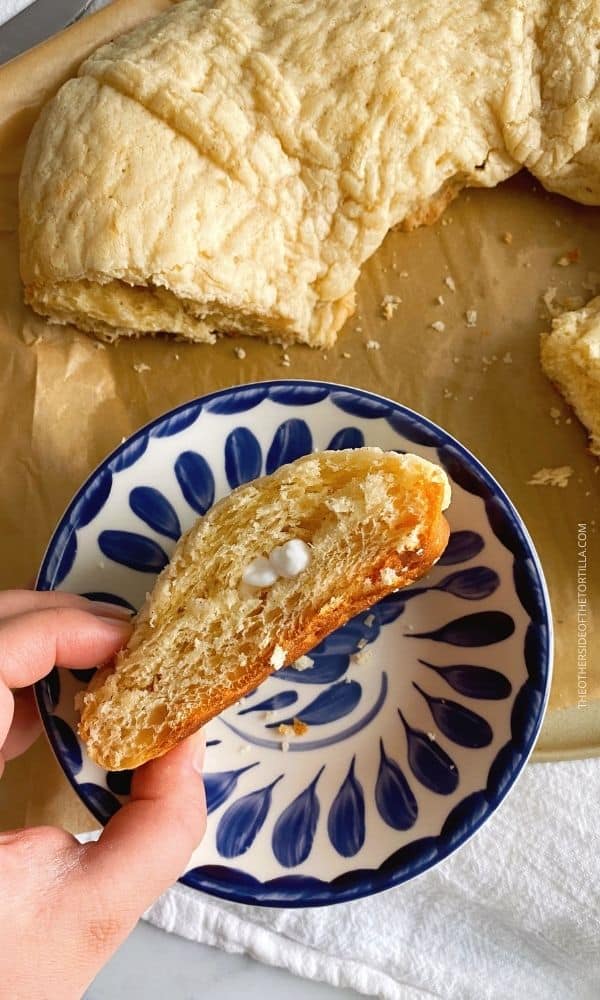
Why is there a baby figurine inside the rosca?
The miniature baby figurine that is baked into the cake is to symbolize the biblical story of Mary and Joseph fleeing Judea to hide the baby Jesus from King Herod (Matthew, 2:13).
These figurines are mostly made from food-grade, oven-safe plastic nowadays, and they are perfectly safe to put inside your rosca. They're easily available online, sold in singles or a bag of many. I found plenty of inexpensive options by searching "king cake baby" on Amazon.
The typical tradition in Mexico is the person who receives the baby in their piece of rosca is responsible for supplying tamales and atole for everyone present on Día de la Candelaria. Known in English as Candlemas, Día de la Candelaria is a Christian Holy Day celebrated on February 2 each year commemorating the presentation of Jesus at the Temple.
Ingredients
This recipe includes a lot of inactive prep time during which the bread dough needs to rise twice, but is easy enough for all levels of bakers.
Ingredients for the bread:
- Bread flour
- Instant yeast
- Sugar
- Whole milk
- Large eggs
- Unsalted butter
- Kosher salt
Ingredients for the sugar crust:
- All-purpose flour
- Powdered sugar (confectioner's sugar, known in Spanish as azúcar glass)
- Unsalted butter
- Vanilla bean paste or pure vanilla extract

What to serve with rosca
It is most traditional to serve Mexican hot chocolate or atole with your cake. Here are a few recipes for atole:
- Champurrado (chocolate atole)
- Vanilla atole
- Atole de nuez (pecan-flavored)
Some tips for optimal baking:
To make the dough, I recommend using a stand mixer, such as a KitchenAid, with a dough hook attachment. This will save you tons of effort and time.
With all the topping being the same color, you can make some pieces look more decorative by dragging a fork gently across the sugar paste to create some lines.
Print
Sugar Crunch Rosca de Reyes
- Prep Time: 4 hours
- Cook Time: 12-15 minutes
- Total Time: 4 hours, 12 minutes
- Yield: 1 Rosca de Reyes; feeds 6-8 people 1x
- Method: Baking
- Cuisine: Mexican
Description
Rosca de Reyes is a ring-shaped yeasted sweet bread served celebrating Epiphany on January 6. This modern version of Rosca de Reyes has only one topping: everyone's favorite crunchy sugar crust!
Ingredients
For the bread:
- 200 grams bread flour
- 6 grams instant yeast
- 36 grams granulated sugar
- 100 grams whole milk, room temperature
- 40 grams unsalted butter, room temperature
- 3 grams kosher salt
- Cooking spray or vegetable/canola oil to lightly grease a bowl for the dough to rise
- A few tablespoons of all-purpose flour to flour your work surface to prevent the dough from sticking to the surface while you shape it
- ½ tablespoon unsalted butter, room temperature, to keep the dough moist during the second rise
For the crunchy sugar paste topping:
- 75 grams all-purpose flour
- 75 grams powdered sugar (also called confectioner's sugar, or in Spanish, azúcar glass)
- 75 grams unsalted butter, room temperature
- 1.5 teaspoons vanilla bean paste or pure vanilla extract
Instructions
- Measure and add 200 grams bread flour, 6 grams instant yeast and 36 grams granulated sugar to your stand mixer bowl. Mix on low speed with your dough hook attachment to gently combine the dry ingredients. Do not add the salt until a later step.
- Add 100 grams whole milk and 1 large egg to the mixer bowl and continue mixing on low speed until combined. The dough will be sticky and lumpy at this stage.
- Stop the mixer and add 40 grams unsalted butter, then increase speed to medium (4 on a KitchenAid). After the mixer has been going for about 5 minutes and the dough begins to gather around the hook, add 3 grams kosher salt, sprinkled evenly around the bowl.
- Continue with the dough hook on medium speed for another 10 minutes. You'll know it's ready when most of the dough gathers around the hook and also makes a slapping sound against the side of the bowl.
- Spray cooking spray or lightly grease the inside of a large glass bowl with vegetable or canola oil. Turn the dough out from the stand mixer bowl and scrape out any dough sticking to the sides. Cover the bowl with plastic cling wrap and a kitchen towel and place in a warm spot to rise for 2 hours, until doubled in size.
- After the dough has doubled in size, remove the plastic cling wrap from the bowl and gently push a few fingers down into the middle of the dough to release some of the gas. Flour your work surface with a few tablespoons of all-purpose flour and turn the dough out onto the flour. Gently form your dough into a long log.
- Line your baking sheet with parchment paper and transfer the dough log to the baking sheet. Arrange the dough in the shape of an oval, making sure to make the hole in the middle sufficiently wide, as the bread will spread as it bakes. If it helps, you can use a small circular dish placed in the middle of your dough ring to help make sure your ring is even. Tuck one end of the dough log underneath the other and try to smooth the seam a bit. If necessary, with some tap water on your finger.
- If you're baking a baby Jesus figurine into your bread, this is the point where you'll want to insert them into the sides or bottom of the bread before it rises. You can add more than one if you like. If you're not using a baby, skip this step.
- Take the remaining ½ tablespoon of unsalted butter at room temperature and rub it between your hands to grease your hands up. Gently use your hands to pat the dough ring to help keep it moist during the second rise. Get as much of the butter off your hands as possible, then cover the dough loosely with plastic cling wrap and a kitchen towel and allow to rise again in a warm place for about 90 minutes until it has nearly doubled in size again.
- While the dough is going through the second rise, make the crunchy sugar topping. Add 75 grams all-purpose flour, 75 grams powdered sugar, 75 grams unsalted butter at room temperature and 1.5 teaspoons of vanilla bean paste or pure vanilla extract to a bowl. Use your hands to incorporate the ingredients until you have a completely smooth paste. Shape it into a rectangle and cover with cling wrap and refrigerate until you're ready to roll it out.
- Once the dough has gone through the second rise, remove the kitchen towel and plastic cling wrap. Preheat the oven to 350 degrees Fahrenheit.
- Remove the sugar paste from the refrigerator and place it between two pieces of parchment paper. It's important to work quickly at this stage because if the paste gets too warm, it will stick to the parchment. Gently roll it out into a rectangle, about ⅛ of an inch thick. Remove the top layer of parchment paper and use a bench scraper or very sharp knife to make uniform cuts into strips. I usually do 2 long cuts for the long sides, 2 shorter cuts for the short sides, and then rectangle cuts for the corners. Cut away any excess.
- Drape each rectangle of sugar paste over the sides and then the 4 corners of the bread. For the corners, you can gently drag a fork through the paste a few times to make a quick and easy design.
- Bake at 350 degrees Fahrenheit for about 12-15 minutes (every oven is a little different), until the exposed bread at the bottom of the rosca starts to brown but the topping is still white.
Notes
You will need a kitchen scale to get precise measurement of the ingredients and a stand mixer such as a KitchenAid mixer and dough hook attachment to make the dough.
24


Leave a Reply