Pan de anis is a type of Mexican pan dulce that comes in various shapes, but always has anise seed to give it its flavor.
My favorite version of these sweet, pillowy anise rolls known as pan de anis are a staple at the famous El Cardenal restaurant in Mexico City, which has been serving traditional Mexican dishes in the capital since 1969 and has an extraordinary bread and pastry service. If you’ve ever eaten breakfast at El Cardenal, then it’s possible you’ve passed over this pan dulce for a concha or other sweet bread you recognize. And while their conchas are amazing, you’ve been missing out if you’ve never ordered these anise rolls!
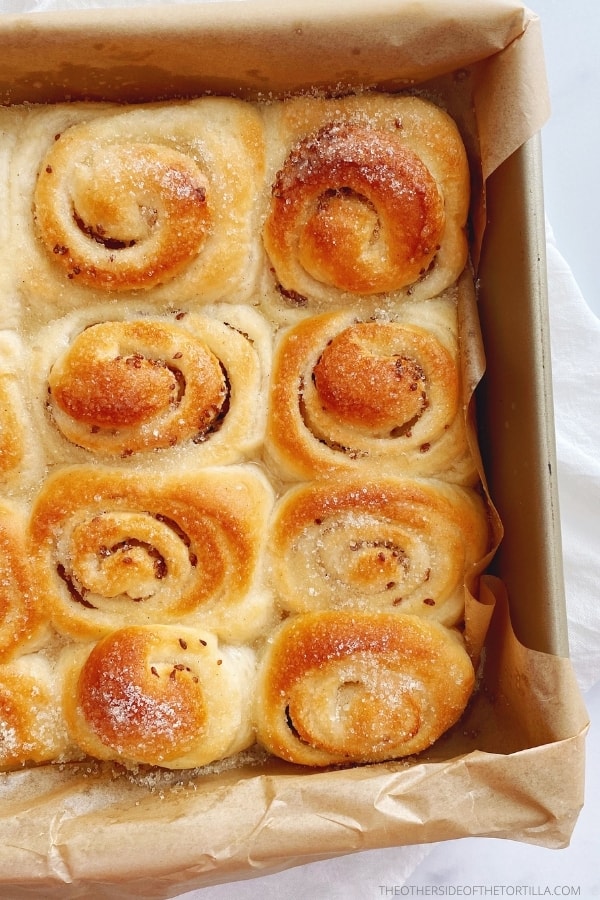
Every time we visit family in Mexico City, we try to make reservations for at least one breakfast and one lunch visit to El Cardenal. And there’s nothing better than a piece of their pan dulce and a mug of chocolate caliente. I always order these anise rolls with a traditional Mexican hot chocolate—made with water and frothed in a pitcher with a molinillo right at your table, the same as it always has been since El Cardenal opened—for drinking and dunking this delicate pan dulce.
If you love pan dulce you should check out my Guide to Mexican Pan Dulce with photos and descriptions of dozens of types of Mexican sweet bread! Some of my other favorite types of pan dulce include conchas, orejas and garibaldi. At home, I love to pair my pan dulce with a steaming hot café de olla, spicy Mexican hot chocolate or mug of atole de vainilla for dunking, too.
How close are these to the original recipe from El Cardenal?
My homemade version doesn’t look identical, but the taste is extraordinarily similar. You can make these rolls smaller or larger depending on the size baking pan you use.
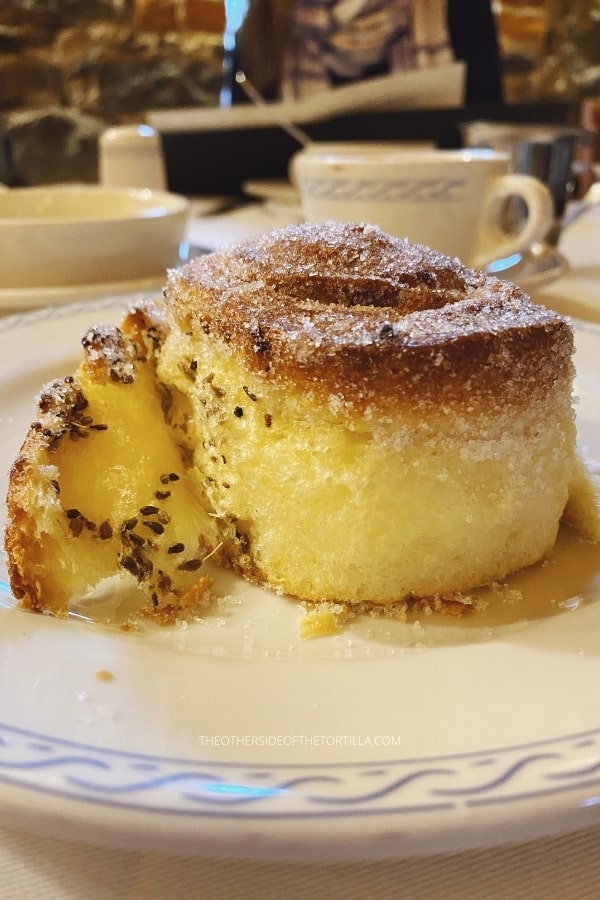
Here’s a photo of the last rol de anís that I ate at El Cardenal:
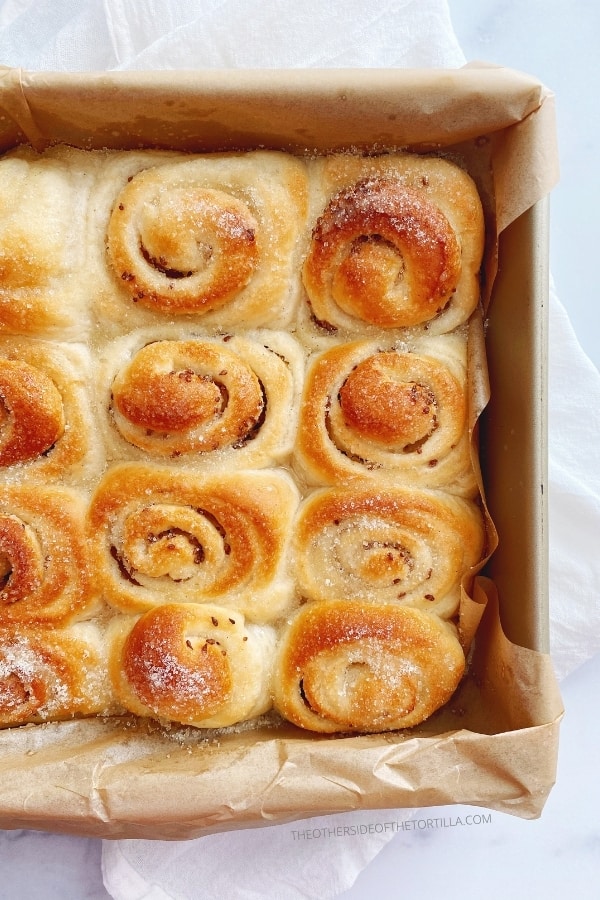
Here’s a photo of the ones I made at home:
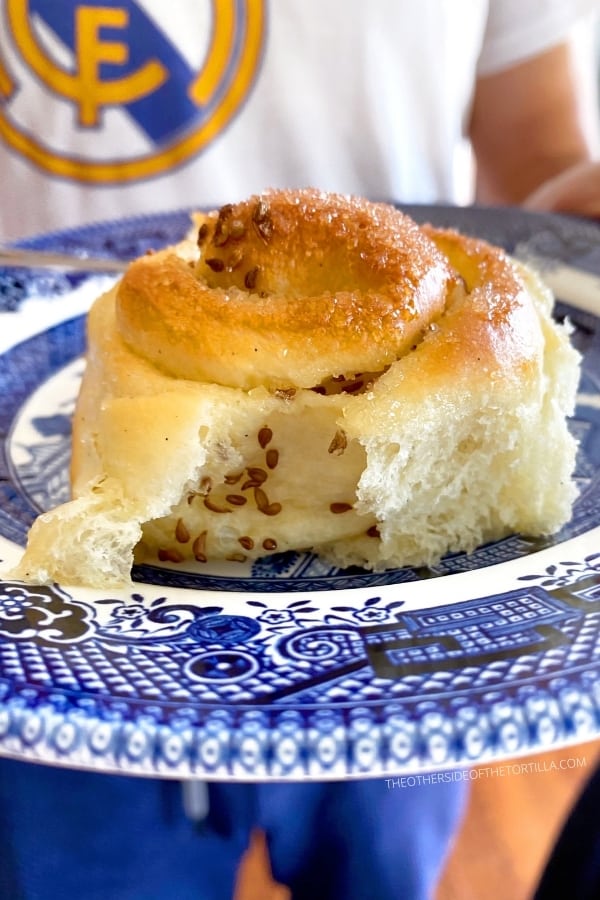
As you can see, mine are not as flat on the top and they’re dusted with a bit less sugar, but otherwise they taste remarkably alike.
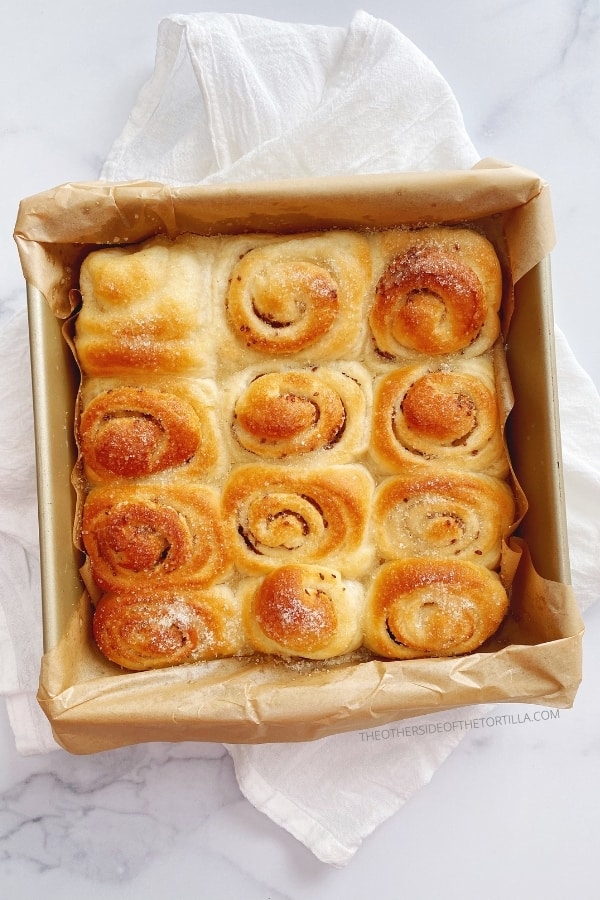
I like to make these rolls in a square pan to give them a bit more room to expand while baking. I typically use a 9×9 square pan and cut them into 9 or 12 rolls. You can absolutely double this recipe to make 6 or 9 rolls that are bigger and very fluffy if you prefer.
Ingredients
There are 9 ingredients in this recipe, most of which you should have in your pantry or refrigerator if you bake regularly.
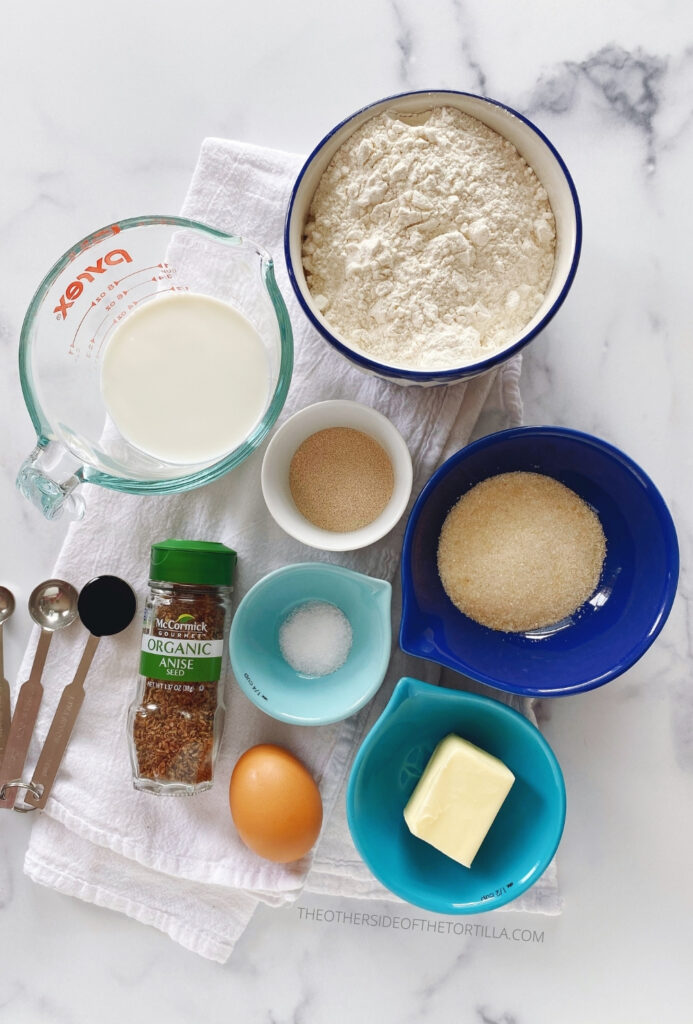
- Bread flour
- Instant yeast
- Sugar
- Whole milk
- Large eggs
- Unsalted butter
- Vanilla bean paste or pure vanilla extract
- Kosher salt
- Anise seeds (an aromatic spice that tastes like licorice)
Kitchen tools you’ll need
I’ve linked the exact products below that I use in my kitchen to produce perfect pan dulce every time.
- A kitchen scale will ensure your ingredient measurements are precise. Remember: baking is chemistry!
- A bench scraper will help you make more precise cuts in the dough.
- Use parchment paper or a Silpat to line your baking sheet to protect the bottom of the pan dulce from burning.
- A 6-quart clear food container with lid for proofing the dough or a very large glass bowl and plastic wrap – this yeasted dough will double in size during the first rise. You’ll grease the container with cooking spray before you put the dough in to rise, in order to prevent it from sticking to the surfaces, then seal tightly with the lid. If you don’t have a container with a lid, a glass bowl and some plastic cling wrap can also do the job.
- A stand mixer makes this recipe much less work, as kneading the dough by hand is really tiresome. I use a 4.5 quart Kitchen Aid tilt-head classic stand mixer.
How to make pan de anís
When making any pan dulce, I recommend you get your ingredients measured out and ready to go before you begin. This is called mise en place (French for “everything in its place”) and it not only helps you move through the steps of the recipe more easily, but also prevents you from getting halfway through and finding out that you don’t have enough of one ingredient.
Make your dough in a stand mixer with the dough hook attachment as directed in the recipe and add all ingredients in the order listed. Because this is a high-hydration dough, it will be pretty sticky. It’s normal for the dough to still be sticking to the bottom of the bowl. If you need to, stop the mixer and scrape down the sides of the bowl to incorporate any dough that’s gotten stuck. The dough will still be very sticky, but should mostly adhere to the dough hook and be easy to remove from the mixer bowl at this point.
Next, you’ll prep your container or bowl for the dough to rise. Spray the inside thoroughly with cooking spray on the bottom and sides to prevent the dough from sticking. Then turn the dough out from the stand mixer bowl and cover with a lid or plastic wrap. Allow it to rise undisturbed for 2 hours.
After the first rise, flour your working surface with all-purpose flour to prevent the dough from sticking. You can work directly on a clean countertop, a large cutting board, or a silicone pastry mat. Gently pat and stretch the dough into a rectangle, sprinkling more flour to prevent the dough from sticking to your hands or the working surface as needed. Using a rolling pin, gently roll the dough out to 10×14 inches.
Sprinkle the sugar filling and anise seeds evenly on the surface of the dough and roll tightly beginning from the long side. Tuck the dough seam on the underside of the anise roll log. Cut the dough log into equal pieces with a bench scraper or very sharp knife. Place them into a parchment paper-lined 9×9 pan with enough space between them to expand during the second rise.
After the rolls have gone through a second rise for about 90 minutes to two hours, they should look like this:
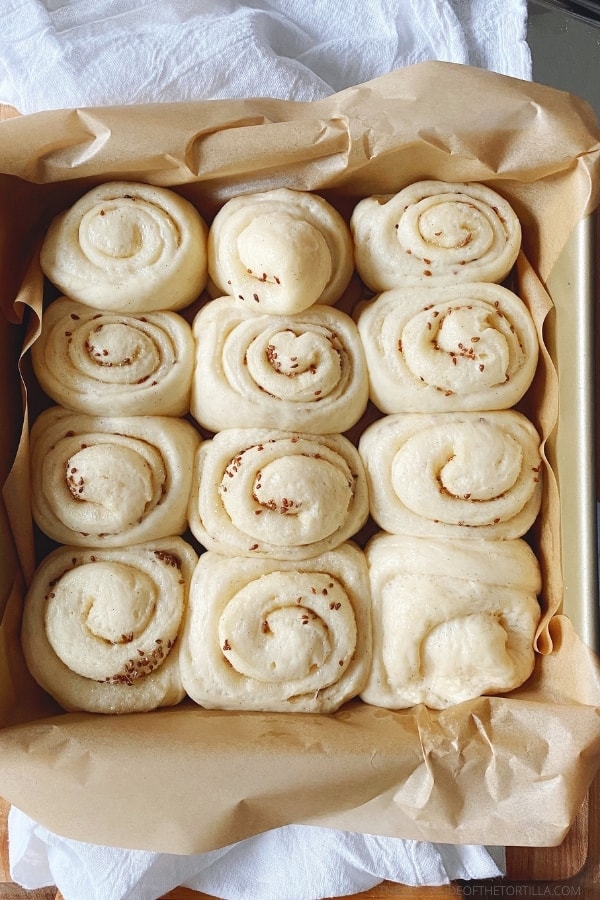
After that second rise, you’ll bake them in a 350 degree F oven for about 10-12 minutes, or until the top of the rolls are moderately browned but not burnt. Every oven is slightly different, and if you’ve cut 9 rolls from the dough, they may take up to 15 minutes. Once you take them out of the oven, brush them with melted butter and sprinkle liberally with sugar to finish and serve your pan de anís immediately.

Pan de anís
- Prep Time: 20 minutes active, 4 hours inactive
- Cook Time: 10-15 minutes
- Total Time: 4 hours, 30 minutes
- Yield: 9–12 rolls 1x
- Method: Baking
- Cuisine: Mexican
Description
These pillowy anise rolls are a pan dulce staple at the famous El Cardenal in Mexico City, a restaurant that has been serving traditional Mexican dishes in the capital since 1969.
Ingredients
- 200 grams bread flour
- 6 grams instant yeast
- 36 grams sugar
- 100 grams whole milk
- 1 large egg, room temperature
- 1 teaspoon vanilla bean paste or pure vanilla extract
- 40 grams unsalted butter
- 3 grams salt
- Set aside: A few tablespoons of all-purpose flour for flouring your work surface
For the filling:
- 1/4 cup sugar
- 2 teaspoons whole anise seeds
For the top of the rolls after baking:
- 1 tablespoon unsalted butter, melted
- 2–3 tablespoons of sugar, for dusting
Instructions
- Measure and add 200 grams bread flour, 6 grams instant yeast and 36 grams granulated sugar to a stand mixer bowl with a dough hook attachment. Mix on low speed to gently combine dry ingredients, but don’t add the salt yet.
- Stop the mixer. Measure and add 100 grams whole milk and 1 large egg to the stand mixer bowl and then resume mixing on low speed. This is a high-hydration dough, so it will be very sticky and may also be lumpy at this stage.
- Add 40 grams room-temperature unsalted butter and vanilla bean paste or pure vanilla extract to the mixer bowl and increase speed to medium (4 on a KitchenAid). After 5 minutes, your dough should be smooth and starting to gather around the hook.
- Add 3 grams of kosher salt sprinkled around the mixer bowl and continue on medium speed for another 10 minutes. It’s ready when most of the dough gathers around the hook, very little is sticking to the sides, and the dough may make a slapping sound against the side of the bowl.
- Spray cooking spray or lightly grease the inside of a large glass bowl with canola oil or vegetable oil. Turn the dough out into the glass bowl and scrape any dough still stuck to the sides of the mixer bowl. Cover with plastic cling wrap and a kitchen towel. Place in a warm location to rise for 2 hours or until doubled in size.
- After the first rise, remove the plastic cling wrap and gently push a few fingers into the middle of the bowl to release some of the gas. Spread a few tablespoons of all-purpose flour on your work surface and turn the dough out on top of the surface. Sprinkle a little more flour on top of the dough to prevent it from sticking to your hands as you shape it.
- Use your hands to first gently stretch the dough into a rectangle. Use a floured rolling pin to gently roll out to a 10×14 rectangle. It’s OK if it’s not a perfect rectangle, but don’t make it too thin. You should have at least 1/4-inch thickness.
- Once your dough is rolled out, evenly spread 1/4 cup sugar and 2 teaspoons whole anise seeds over the dough. Roll starting from the long end and tuck the seam under the bottom.
- Use a bench scraper or a very sharp knife to divide the dough into 9-12 equal pieces. Arrange them in a 9×9 square pan lined with parchment paper. Cover with a kitchen towel and place in a warm location for a second rise until the rolls have doubled in size; this should take 1.5-2 hours.
- Bake in a preheated 350 degree Fahrenheit oven for about 10-12 minutes, until the tops and sides look sufficiently browned but not burned. If you’ve cut 9 larger rolls, they may take as much as 15 minutes in the oven, as every oven is a little different.
- Remove from the oven and immediately brush with 1 tablespoon unsalted melted butter and sprinkle 2-3 tablespoons of sugar liberally over the top.
- Allow to cool for 10 minutes and then serve.
Notes
To make the dough ahead of time: You can make this dough the night before and allow it to rise overnight in the refrigerator. The temperature will slow the growth of the yeast, but it should be plenty of time to double in size. If it doesn’t quite double, you can leave it out on the counter for about 30 minutes to come to room temperature and rise a bit more.
Any bread that is not eaten immediately should be stored in an airtight container to prevent it from drying out.
Keywords: pan dulce, pan de anis, pan de anís, roles de anís, anise rolls, anise
The recipe calls for Bread flour, could I use AP instead ?
No, you cannot substitute AP flour for bread flour in this recipe. It will not achieve the same results.
Very nice pan de anis recipe. Never tried, but look delicious. Will surprise my family next week. Great pictures and instructions. Thanks for sharing.
★★★★★
Awesome recipe!! Enjoyed making. Thanks for sharing!
Belinda
★★★★★
I made these and they are wonderful! I did double the recipe. Split the dough after the first rise so it would be easier to roll out. Used a 9 x 12 pan. I ended up with 12 very beautiful rolls. Plus a couple end pieces I baked right away to sample 🙂 Gave it an hour in the morning to fully rise. Baked for 22 minutes. I will make these again and again!
Thank you for sharing!
★★★★★
Hello! This recipe sounds great. Can I substitute dry active yeast for the instant yeast and what would that look like? Thank you so much!
Hi Debra, you can substitute dry active yeast for the instant yeast, but you will need to proof longer because the dry active does not rise as quickly. It may need as much as 2-3x longer to proof.
Oh my goodness these are amazing. I’m always looking for new recipes with anise and now have a new favorite. I can’t believe how light & fluffy they are.
★★★★★