• Skip to primary navigation
  • Skip to main content
  • Skip to primary sidebar

The Other Side of the Tortilla logo

  • RECIPES
  • INGREDIENTS
  • ABOUT
  • TRAVEL
  • RESOURCES
menu icon
go to homepage
  • RECIPES
  • INGREDIENTS
  • ABOUT
  • TRAVEL
  • RESOURCES
search icon
Homepage link
  • RECIPES
  • INGREDIENTS
  • ABOUT
  • TRAVEL
  • RESOURCES
×

Mexican Christmas Traditions

SALSA VERDE (Cooked and Raw)

27 · Aug 30, 2009 · 9 Comments

Tomatillos GAL
tomatillos milperos

Salsas are the lifeblood of just about every Mexican dish. They can be cooked or raw, made in the blender or in a molcajete. Salsa can make or break any dish, add a special dimension of flavor or even make a dish edible (you wouldn’t eat chicharrón without cooking it in salsa to soften the dried meat).

The simple combination of tomatoes (jitomate or tomatillos/red or green), chiles (of any variety) and other ingredients like onion, garlic and spices is essential to many traditional dishes in Mexican cuisine. Salsa verde is certainly a staple in my house, whether it’s cooked and used for guisados like chicharrón en salsa verde, or raw salsa used for garnishing tacos.

You’ll notice this same cooked salsa recipe will be used over and over again in a number of dishes you’ll read about here and I’ll reference back to it often and sometimes modify it (for example, when making chilaquiles, I substitute fresh chicken stock in place of water).

In Mexico, we’ve eaten similar recipes to mine at many of our favorite restaurants, though some places use epazote in their cooked salsa (an ingredient I don’t use). In Chicago, we haven’t found a place that makes salsa verde the way we like it—or anywhere near it, really. Because of this, we sometimes order take out from our favorite Mexican restaurants and bring it home to eat it with our own homemade salsa.

Chile Serrano WEB
chiles serranos


Print
Salsa verde (cooked)

Prep Time: 10 minutes

Cook Time: 15 minutes

Total Time: 25 minutes

Salsa verde (cooked)

How to make Mexican cooked green salsa.

Ingredients

  • A little over 1 pound of small (milpero) tomatillos, dehusked & thoroughly washed
  • 3-6 serrano chiles (depending how spicy you like it; start with less and add them to increase heat), stems cut off
  • 1-2 cloves of garlic
  • 2 ¼-inch slices of white onion
  • A big pinch of Kosher salt

Instructions

  1. First, remove the husks and wash the tomatillos well. You’ll notice they’re sticky, which is a sign of ripeness, and probably slightly dirty under the husk. Sometimes I find that warm water isn’t enough, and I use a few drops of dish soap diluted in a bowl of warm water. Then I put the husked tomatillos in the bowl and gently rub each one in the slightly soapy water to remove the dirt and sap. Rinse them well in cool water to remove any soap residue.
  2. Fill a pot with water (large enough to fit all the tomatillos) and bring to a boil. Put the tomatillos in and cook in the boiling water until the tomatillo flesh begins to get transparent.
  3. Using a slotted spoon, transfer the tomatillos to a blender. Add the onion, garlic and salt.
  4. Cut the stems off the serrano chiles and cut each chile into a few pieces so they’re easily chopped in the blender. Start by adding 2 chiles to the blender with about ¾ of a cup of water and blend on high (liquify or puree) until smooth and the chiles and tomatillos are completely incorporated. Taste the salsa to see if it’s too hot; if it needs more chile, add them one at a time, blending & tasting the result until you are happy with the level of heat from the chiles.
  5. If it seems the salsa is not quite liquid enough, add another ¼ cup of water. The salsa will reduce slightly when cooked.
  6. Pour blender contents into a saucepan and heat over medium flame until the salsa boils, occasionally stirring. Remove from heat and allow to cool before storing in an airtight container in the refrigerator.

Notes

Stores well in the refrigerator in an air-tight container for about 10 days.

3.1
https://theothersideofthetortilla.com/2009/08/salsa-verde/
©2009-2024 theothersideofthetortilla.com

Tip: for extra flavor with salsa verde cocida, you can also add 2 strips of chicharrón (with meat still attached) to season the salsa. You should add the chicharrón during the end stage when you cook the salsa until it boils for a few minutes, then remove from heat and allow to come to room temperature before storing to infuse the chicharrón flavor. This flavor infusion method only works with the cooked salsa.

Print
Salsa verde cruda (raw green tomatillo salsa)

Prep Time: 15 minutes

Salsa verde cruda (raw green tomatillo salsa)

How to make Mexican salsa verde cruda (raw tomatillo green salsa)

Ingredients

  • A little over 1 pound of small (milpero) tomatillos, dehusked & thoroughly washed
  • 3-6 serrano chiles (depending how spicy you like it; start with less and add them to increase heat), stems cut off
  • 1-2 cloves of garlic
  • 2 ¼-inch slices of white onion
  • A big pinch of Kosher salt

Instructions

  1. First, remove the husks and wash the tomatillos well. You’ll notice they’re sticky, which is a sign of ripeness, and probably slightly dirty under the husk. Sometimes I find that warm water isn’t enough, and I use a few drops of dish soap diluted in a bowl of warm water. Then I put the husked tomatillos in the bowl and gently rub each one in the slightly soapy water to remove the dirt and sap. Rinse them well in cool water to remove any soap residue.
  2. Put the raw tomatillos directly into the blender with all other ingredients. Add the chiles to taste, starting with 2 and adding more if necessary. If it's too dry, add a few tablespoons of water to the ingredients and blend well until smooth.
  3. Serve immediately and store any leftovers in an air-tight container in the refrigerator for up to 3 days.

Notes

Stores in an air-tight refrigerated container for up to 3 days.

3.1
https://theothersideofthetortilla.com/2009/08/salsa-verde/
©2009-2024 theothersideofthetortilla.com

  • What do you do differently in making your salsas verdes or where is your favorite place to eat a dish that includes salsa verde?

CAFÉ DE OLLA

93 · Aug 24, 2009 · 26 Comments

I vividly remember the first time I really tasted café de olla. It was a sunny summer morning in Mexico City’s upscale Polanco district and I was eating brunch with my then-boyfriend and his parents at a well-known restaurant (side note: I would later marry him). I say “really tasted” because I know that a few times earlier in my life I’d had some bastardized versions—God-knows-where in the Midwest—that just had cinnamon in it and were called “Mexican coffee,” or worse, actually passed off as café de olla by name on the menu.

In terms of food and beverage experiences, this first taste of real café de olla was a pivotal moment in the way that I viewed coffee. It suddenly became more than a morning caffeine fix, laced with milk and sugar. The restaurant, El Bajío, has become one of my all-time-favorite places and is known for its truly traditional Mexican fare. They serve their café de olla in a beautiful tiny earthenware mug that resembles a larger olla. If you’ve never seen one, an olla is a big lead-free clay pot that is glazed on the inside for cooking and typically painted with a folk art design on the outside. How to make authentic Mexican café de olla - recipe via theothersideofthetortilla.com 
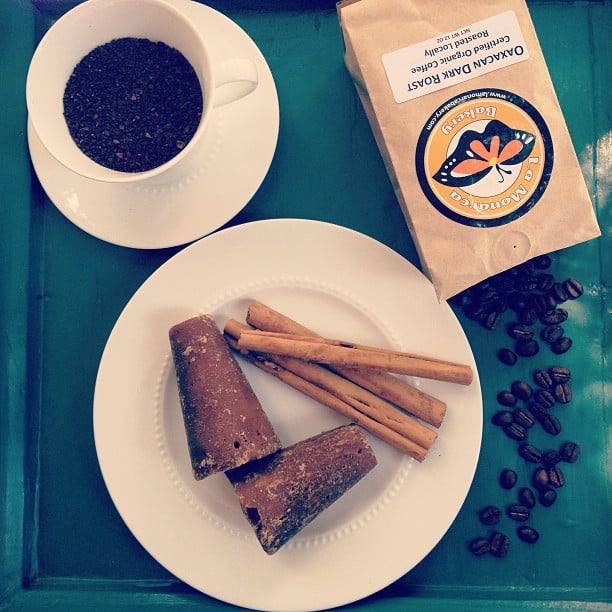
El Bajío also introduced me to many traditional foods that I’d never eaten before and changed the way I felt about Mexican cooking. So, I suppose to say it changed my view of coffee is certainly an understatement. It introduced me to a host of new flavors and ideas; it made me want to learn to cook traditional Mexican food and toss out any Americanized recipe I’d ever made. It is for the above reasons that I chose café de olla as the first recipe to share here. If you’ve not been to Mexico City, you likely haven’t heard of El Bajío. Founded in 1972 by Raúl Ramírez Degollado and Alfonso Hurtado Morellón, the restaurant is now run by Carmen “Titita” Ramírez Degollado, who took over when her husband passed away in the late 1970s.  El Bajío has six locations: the original, Cuitláhuac, and five others. Of the many times I’ve had the pleasure to eat there, I’ve only ever visited the Polanco location but my husband has been to both the Cuitláhuac and Polanco dining rooms. Usually when we go to El Bajío with family, it’s to the one in Polanco. To read more about the restaurant and to view their menu, you can visit El Bajío online. When I returned to Chicago that summer, one of the first things I did was make the trip to a Mexican grocer in Pilsen to find piloncillo and start experimenting. Named for its cone shape, piloncillo is unrefined brown sugar, a result of the crystallization of two types of sugar cane. It’s also known as panela or panocha, though I wouldn’t walk into a store and ask for it using those names; you may get some strange looks due to the slang meanings. How to make an authentic Mexican café de olla - recipe via theothersideofthetortilla.com Some people like to flavor their café de olla with whole cloves, aniseed or allspice. I did a bit of research and there are even some weirdos who put semi-sweet chocolate in their café de olla—guacala. (A Spanish expression reserved for a supreme form of icky.) Not me; I like to keep it pretty simple. Now, every time I drink café de olla, I close my eyes with the first sip and remember the start of my journey into traditional Mexican cooking. I hope you’ll enjoy my recipe below, and please feel free to leave comments with your thoughts, fond memories of café de olla or what you do differently in your recipe. TIP: If you don’t have an olla (and most people don’t have this traditional clay pot) you can steep the coffee directly in the saucepan and strain before serving. I often use a 32-ounce French press to avoid spilling while straining the loose coffee grounds and cinnamon sticks from an olla; the instructions below are for steeping with a French press. If you use a saucepan or an olla, it is best to use a fine mesh sieve over a serving carafe to filter out the coffee grounds and cinnamon sticks. If you don’t have a fine mesh sieve, you can use a regular-sized sieve with some cheesecloth to catch the grounds. Print
clock clock iconcutlery cutlery iconflag flag iconfolder folder iconinstagram instagram iconpinterest pinterest iconfacebook facebook iconprint print iconsquares squares iconheart heart iconheart solid heart solid icon
How to make authentic Mexican café de olla - recipe via theothersideofthetortilla.com

Café de olla

5 Stars 4 Stars 3 Stars 2 Stars 1 Star 590 from 1 review
  • Yield: Yields 2 servings if you use big mugs or 4 servings if you use small coffee cups. 1x
Print Recipe
Pin Recipe

Description

How to make authentic Mexican café de olla with a French press.


Ingredients

Units Scale
  • 3 ¼ cups water
  • ½ cup whole coffee beans
  • 2-3 sticks of Mexican cinnamon
  • 3-4 small cones of piloncillo (about 1 ounce each)
  • 1 teaspoon unsulphured molasses (optional, but adds a nice depth)

Instructions

  1. Boil the water in a medium saucepan. When the water is at a rolling boil, add the cinnamon sticks and piloncillo. Allow it to boil for a few minutes and then reduce to medium heat, stirring until the piloncillo is completely dissolved and you can smell the cinnamon.
  2. Remove from heat and let it sit to steep the cinnamon for 3-5 minutes.
  3. Grind the coffee beans to a medium-coarseness (make sure not to grind too fine or you’ll get sludge at the bottom of your cup). It’s important that the coffee is as freshly-ground as possible.
  4. Remove the cinnamon sticks and reserve.
  5. Pour the liquid mixture into the French press carafe. Pour coffee grounds over the liquid and push the press down just enough to fully wet the grounds, then pull up so the grounds are released and begin to steep. Allow it to steep for about 5 minutes.
  6. Pour into a small coffee cup. If you’d like, add a cinnamon stick to your cup for a little extra cinnamon flavor.

Did you make this recipe?

Tag @maurahernandez on Instagram or Threads

  • « Go to Previous Page
  • Page 1
  • Interim pages omitted …
  • Page 81
  • Page 82
  • Page 83

Primary Sidebar

¡Bienvenidos!


Hi, I'm Maura Hernández, an award-winning food and travel writer, recipe developer, and former journalist sharing my passion for all things Mexico. I've traveled Mexico extensively over the last 18 years and Mexico City is my home away from home. Here, you'll find a mix of traditional and modern Mexican cooking, along with my advice on where to eat, stay and play on your visit to Mexico!

More about me

Paletas

  • Berries and cream popsicles are a mixed-berry spin on the traditional Mexican fresas con crema dessert. Recipe via theothersideofthetortilla.com
    Moras con Crema Popsicles
  • How to make strawberry hibiscus popsicles via theothersideofthetortilla.com
    Strawberry hibiscus popsicles
  • Mangonada popsicles displayed on a cookie sheet
    Mangonada popsicles
  • How to make banana, chia and coconut milk popsicles. This recipe is dairy-free and vegan-friendly! Via theothersideofthetortilla.com
    Banana chia popsicles
  • Mango cantaloupe and chile powder paletas from The Other Side of The Tortilla
    Mango cantaloupe paletas with chile powder
  • #Vegan fudge #popsicles made with avocado, raw cacao powder, coconut sugar and coconut milk. Get more #recipes from theothersideofthetortilla.com #paletas #receta #recipe
    Vegan avocado fudge pops

Footer

↑ back to top

About

  • Privacy Policy
  • Disclaimer

Contact

  • Contact Me
  • Media Kit
  • FAQ

As an Amazon Associate, I earn from qualifying purchases.

Copyright © The Other Side of The Tortilla, 2009-2024